
Unique to rigid heddle weaving, hybrid warping allows a weaver to wind a warp and put it on the loom at the same time! This would be a good method for two heddle projects, longer warps, and warps with more than two colours. This is a huge time saver and a great way to put on a longer warp when you don’t have room for a direct warp set-up. It also allows those with mobility concerns to sit while warping, making it a more accessible warping process.

Before You Begin
Choosing a Warping Board
Many of the newer looms come with optional pegs that you can use on the bottom of your loom to wind a warp and put it on in the indirect method. However, because we are going to use the warping board and the loom at the same time, this kind of setup will not work in this situation.
Warping boards come in various dimensions and are designed to be affixed to a wall or used on a table. Find the one that works best for your space and the type of loom that you have, considering the maximum warp length for your loom. This is determined by the distance between the back warp beam and the roller. Ashford rigid heddle looms, for example, can handle from 5 to 15 yards of warp depending on their width. In general, the wider the loom, the longer the warp it can handle, as the warp beam-to-back beam distance usually increases as looms get wider. So if you have a smaller loom, 12” or less, then it doesn’t really make sense to get a bigger warping board.
SweetGeorgia offers two warping boards from Schacht, a 4 ½ yard capacity version and a 14-yard capacity version. SweetGeorgia also carries the Schacht 18-yard capacity horizontal Warping mill. However, a mill is a great option for 12+ yard warps, but it won’t work for this method of warping. In hybrid warping, we need a straight path for our warp and cannot wind around a mill.
Yarn Management
No matter which type of warp method you are using, you will need to make sure that your yarns wind onto your warp without tangles and have even tension. Weaving yarns wound on a cone are designed to come from the top of the cone, whereas tubes or spools of weaving yarn are designed to unwind from the side, so they each need a different type of holder. To avoid tangles, make sure that your cones or spools are set up in a way that will allow them to unwind cleanly using a cone holder or a spool rack.
If you don’t have a spool rack, you can fashion one from a dowel and shoebox by making a hole in the middle of each short side of the box and threading the dowel through the two holes. Be sure that the placement of the holes allows the spool to move freely. If you find the dowel sliding out, you can use a cork, or another kind of stopper on either end of the dowel on the outside of the box. I like to use knitting needle protectors.
Cones can stand on the floor without a holder but if you find them tipping over frequently you might be able to use a dish rack or place a small cup inside to prevent them from tipping over.
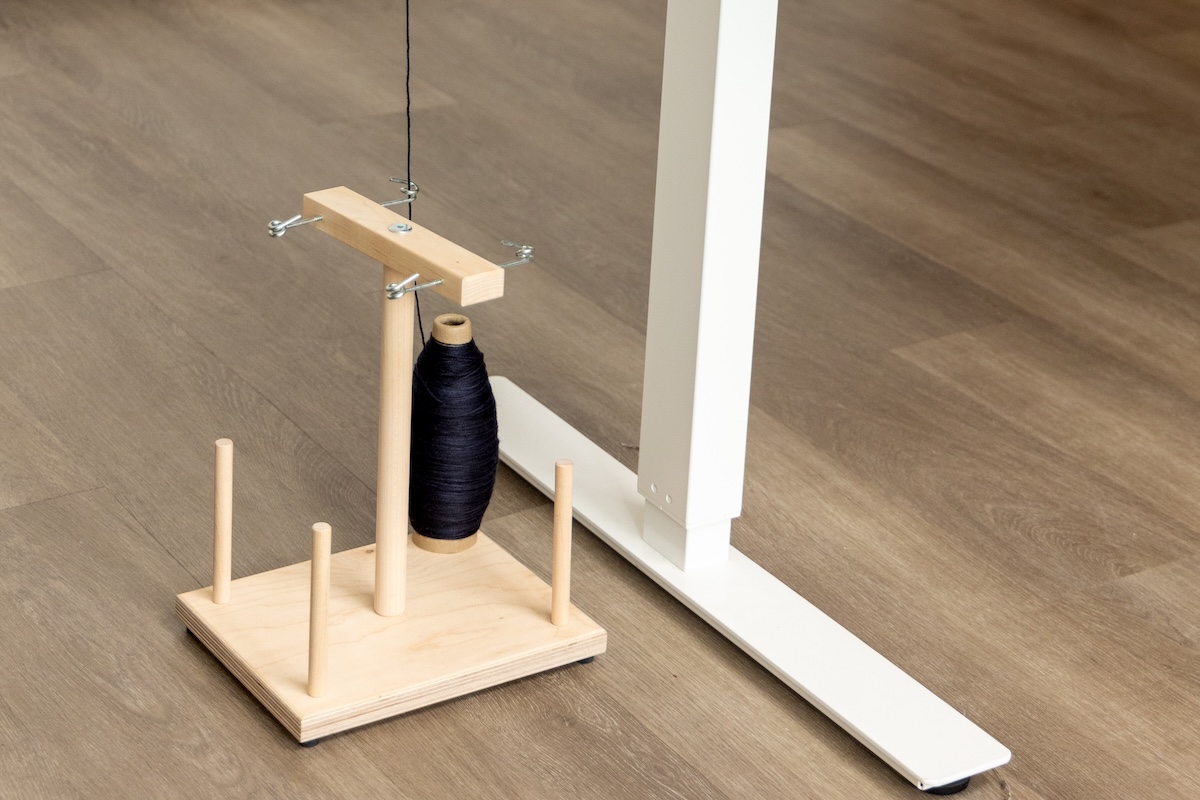
If you are using a skein of knitting yarn with a single colour for your warp, you can wind directly from an umbrella swift. If you are winding multiple colours or threads, you can wind your skeins into balls using a ball winder or onto 4” storage spools that hold ½ lb of weaving yarn with a bobbin winder. Make sure that the spools you use will work with your bobbin winder. Balls of yarn can be managed by placing them into a mason jar or bowl to prevent them from rolling around underneath you.
How to Use the Hybrid Warping Method
What Materials You Will Need:
- Warping board
- Two bar clamps
-dimensions to fit your warping board/table configuration - Rigid heddle loom with heddles
- Four wooden dowels
-longer than the width of your loom - Loom table clamp
- Washi or other removable tape
- Scissors
- Sleying hook
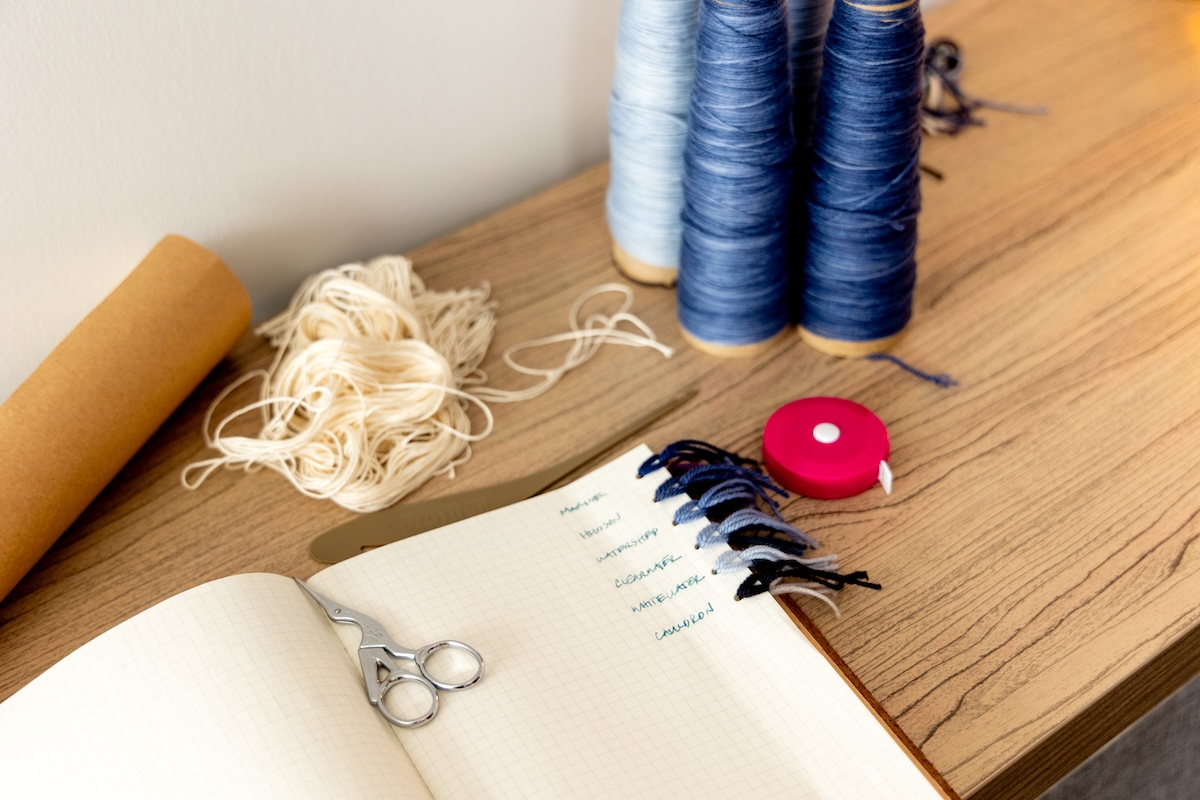
- Weaving yarn
- Cone holder, spool holder, or vessel for yarn
- Paper for winding on the back beam
- Hair elastics or rubber bands
- Smooth waste yarn such as 8/2 cotton
-for guide string as well as any choke ties - Measuring tape
Setting Up to Warp
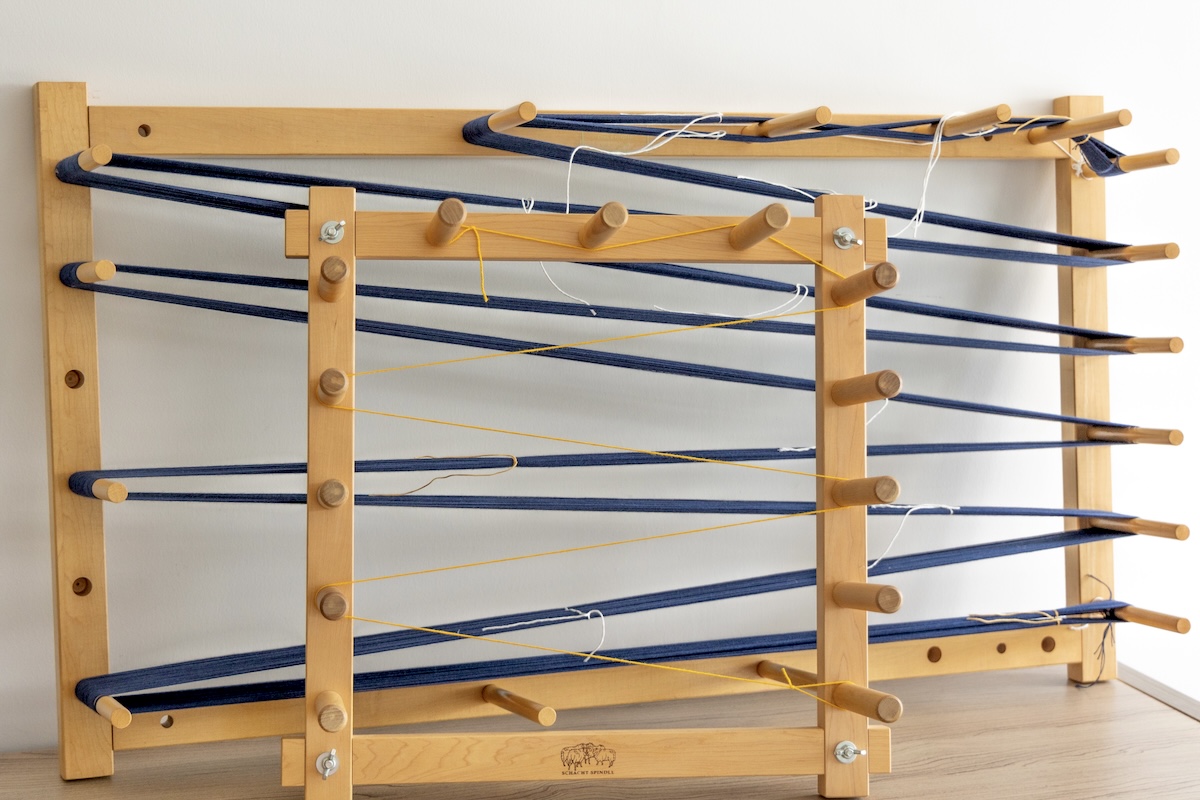
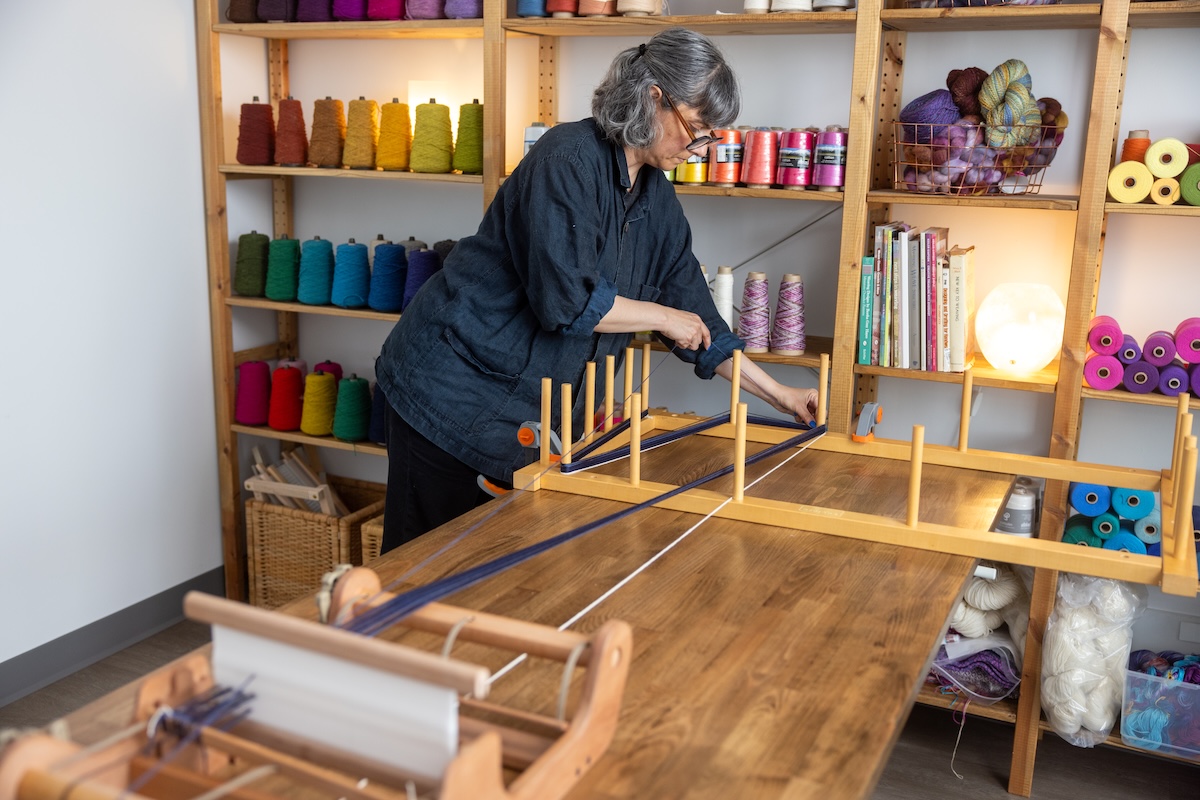
Hybrid warping is a combination of direct and indirect warping. You are basically direct warping, but instead of using a peg for the end of the warp, you use a warping board clamped to the table.
To set up, you will need 1-2 bar clamps to affix the warping board to your work surface. You will use the clamp that came with your loom to attach the loom to the opposite side of the work surface, making sure that you can move all the way around. I like to position the warping board so that the last peg of the warp thread will be centred on the loom.
I also like to work along one side of the table, moving from front to back repeatedly, so I orient the loom towards the most accessible side of the table or work surface, this saves time and energy. If you prefer a seated position, you can use a wheeled chair to move back and forth from the warping board to the loom.
At this point, it’s a good idea to measure out a guide thread from a smooth piece of waste yarn in a contrasting colour. A guide thread is the path you will take every time you pass the warp yarn between the the loom and through the warping board. The guide thread should be the length of your warp plus 6-10” to accommodate a loop that you will tie on either end. Make a loop on one end and place it over a peg on the warping board, follow a zigzag pattern until you find the right path so that the other end of the guide thread reaches the back of your loom.
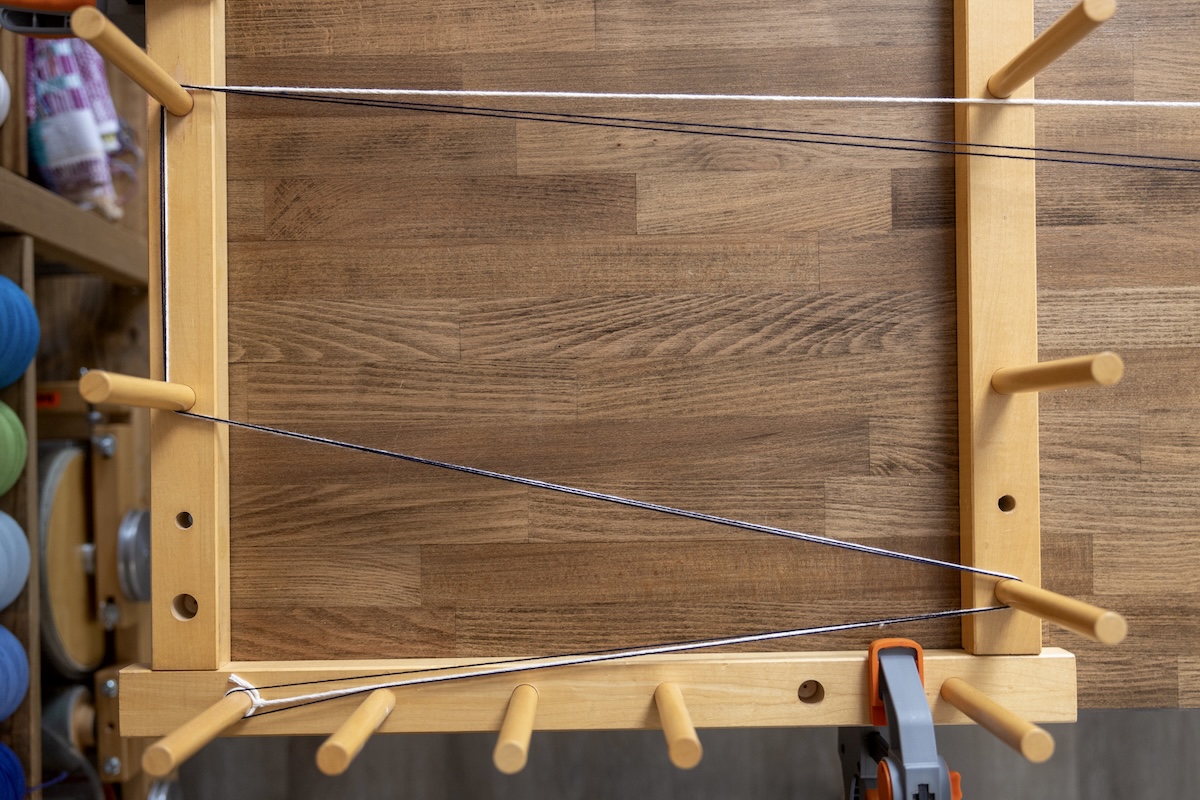
You can use a piece of tape to attach the guide thread to the table. It may take a bit of experimentation to work out the right path, but having a guide thread will help you remember where you need to follow with your warp threads. Shift the position of the warping board or loom, if you must, to make sure the guide thread is centred on the loom.
Measuring the Warp
Place your yarn on the floor near the loom as you would with direct warping. I like to have it positioned on the opposite side from where I’m starting. This allows the yarn to move in one direction without crossing over itself.
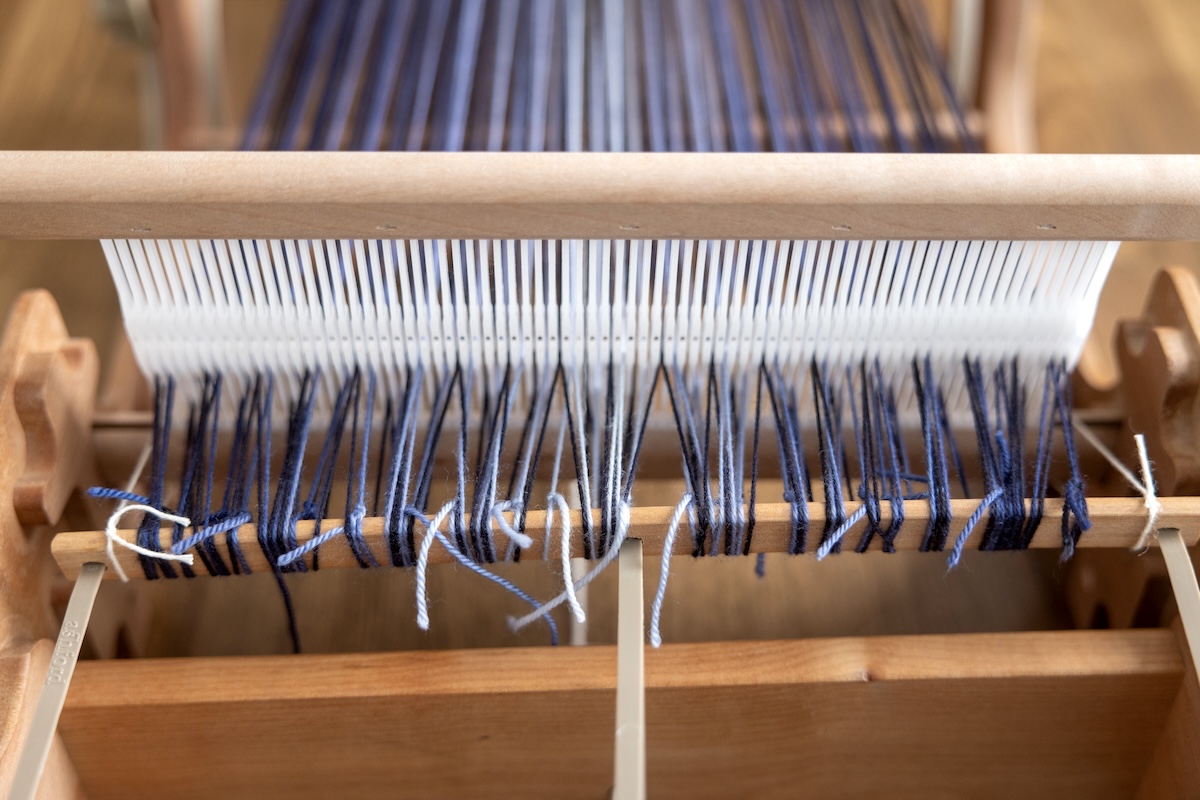
Tie one end of the warp yarn to the warp rod at the back of the loom, making sure that the warp rod is going over the back beam. Using a sley hook, pull a loop through a slot that corresponds to one selvedge edge of your weaving, follow the guide thread path and loop around the peg. Make sure that you have measured out half of the width of your piece from the center so that your warp will be centred on the loom.
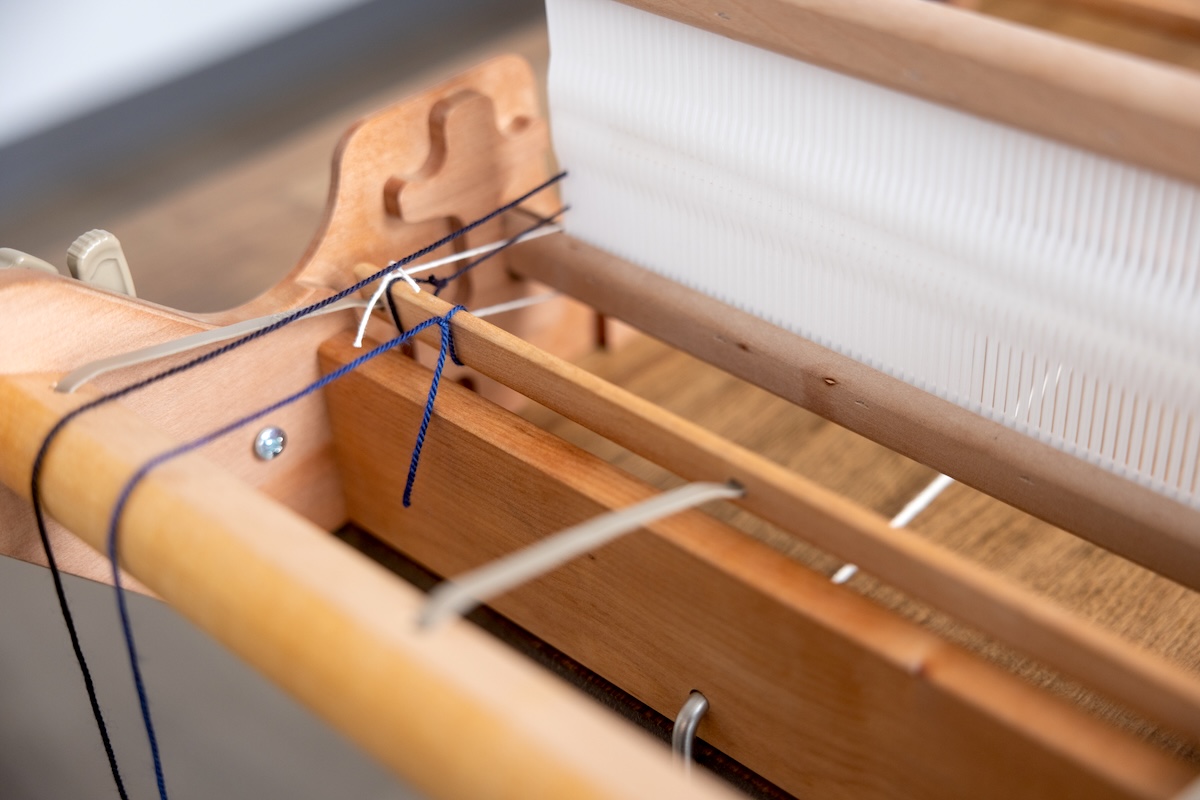
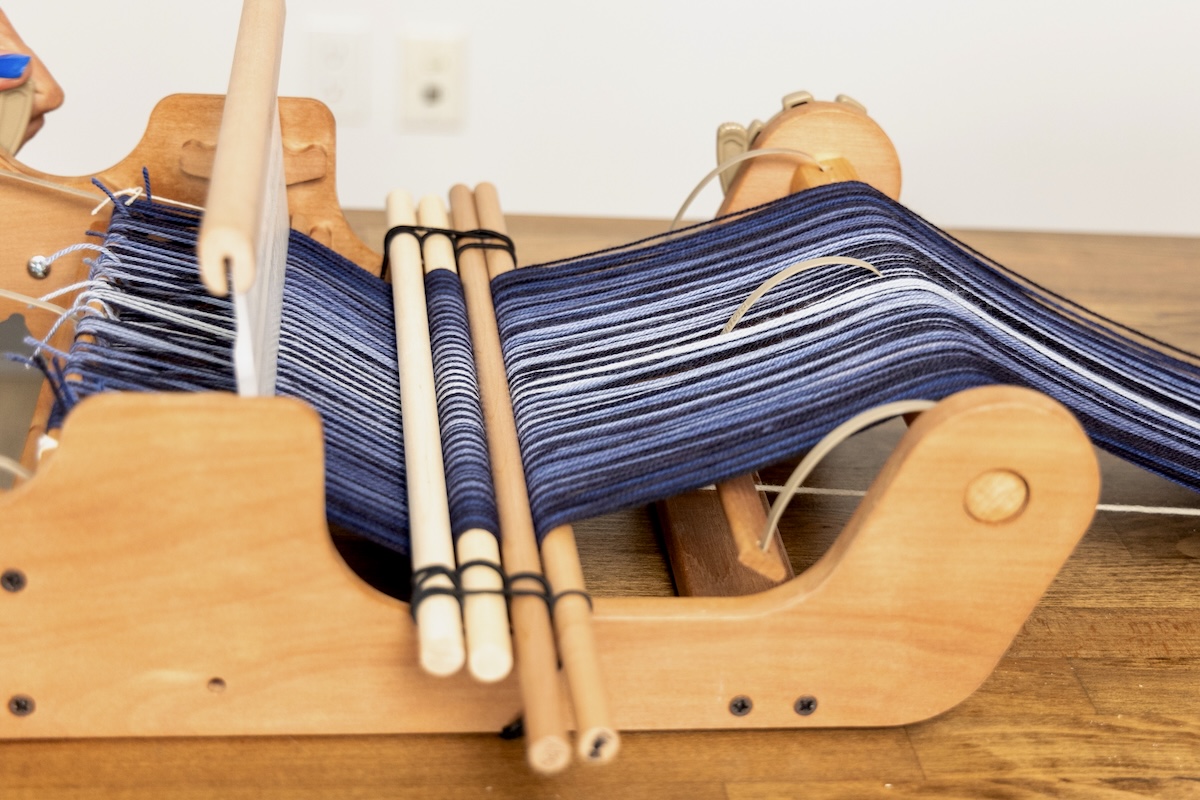
You will follow the path back and forth, always looping around the same peg, pulling loops through the slots in the heddle, and wrapping around the back beam just like direct warping.
Unlike indirect warping on a warping board or mill, we do not need to place a cross in the warp. The heddle will do all the organizing work for us.

Winding on the Warp
From this point forward, the warping method is the same as direct warping. Take the warp off the peg and let it sit on the table. If you prefer, you can add choke ties at regular intervals, but I haven’t found this necessary if I do the whole process at once and use a tensioning device.
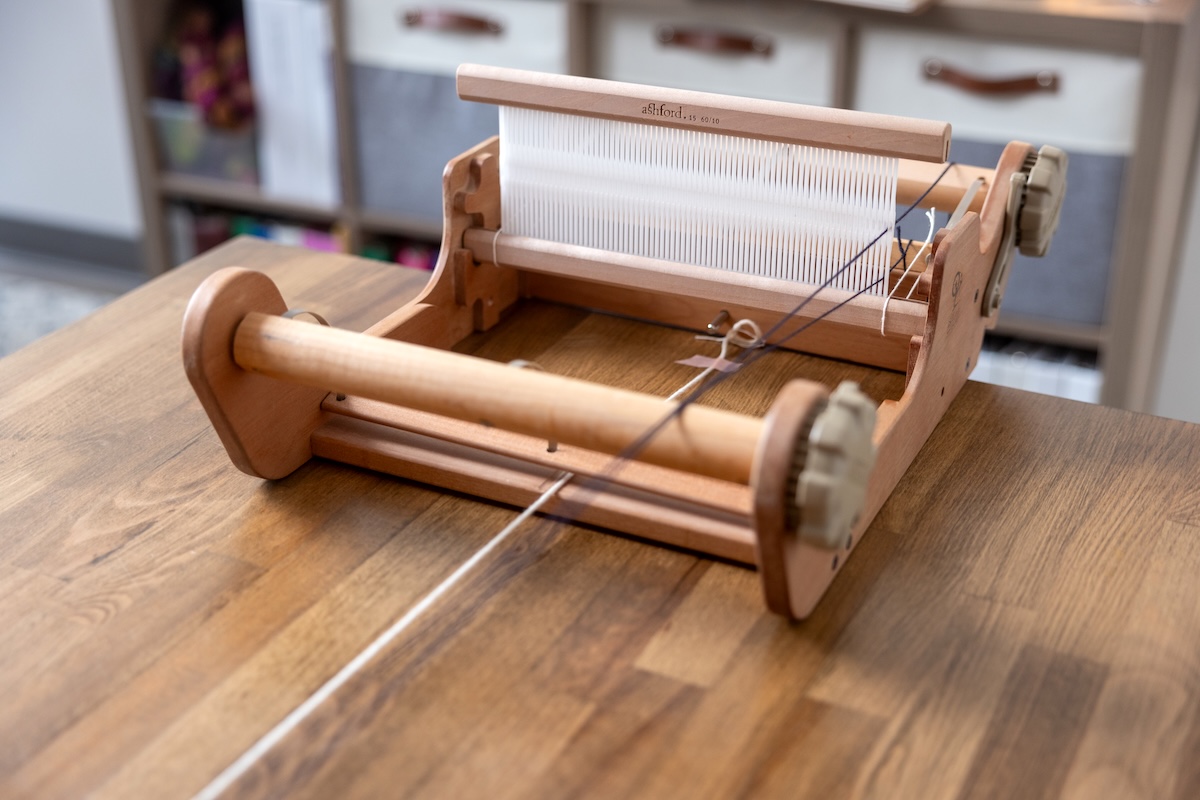
Place stiff paper between the layers of warp on the back beam and wind it on. I like to secure my paper roll to the back roller with a little bit of washi tape and use a tensioning device to keep the warp tension nice and even. Once the warp reaches the front beam, you can cut the warp end, move warp threads from slots to holes so that there is one in each slot and hole (or the pattern requirements), tie on with surgeons’ knots or your favourite method, and you’re ready to weave!
Hybrid Warping Tips for Stripes and Uneven Numbers of Colours
If you have stripes or uneven numbers of different colours like a colour and weave pattern, you can use the same principles that you would use in direct warping.
For Uneven Stripe Numbers:
- Cut off the extra thread on the warping board side.
- Tie the old colour onto the warping board peg or tie it onto the new thread colour.
- Start warping with the new colour from the warping board side, or start the new colour on the back beam rod of the loom.
- Keep wrapping and following the path of the guide thread until your next colour change.
For Even Stripe Numbers:
- Cut off the thread on either side, the warping board, or the back beam on the loom.
- Tie the old colour thread onto the warping board peg, onto the rod of the back beam of the loom or tie it onto the new thread colour.
- Keep wrapping and following the path of the guide thread until your next colour change.
For more warping inspiration check out my Clasped Warp and Weft on a Rigid Heddle course at the School of SweetGeorgia.
Interested in learning further about weaving techniques and more? Come and explore our online weaving course content and community of fibre arts makers at the School of SweetGeorgia! If you’re not yet a member, use the coupon code WINTER24 to join in the fun with 15% off your first payment. We look forward to seeing you inside the School!
The post The Best of Both: Exploring Hybrid Warping appeared first on SweetGeorgia Yarns.


