
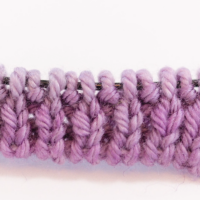
The tubular cast on is an invisible cast on that’s great for hems cuffs and ribbing edges, where you want to have a bit of elasticity. We have both video and written instructions available in this post. Let’s get started!
How To Knit a Tubular Cast On
Equipment
-
1 Scrap yarn (smooth)
-
1 Knitting (working) yarn
-
1 Scissors
Instructions
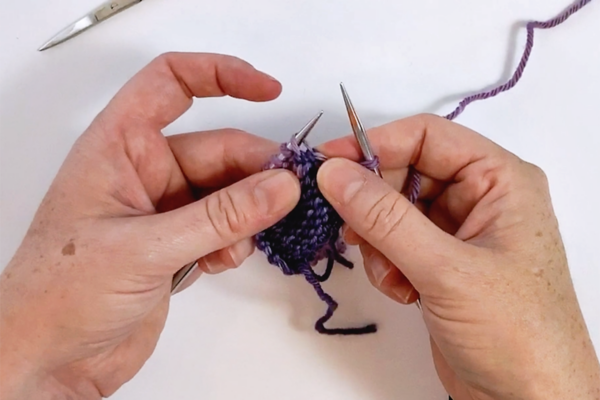
Tubular Cast On Setup
-
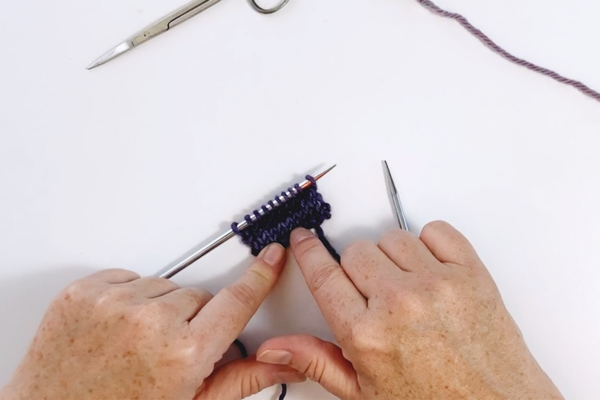
Now, to begin, you're going to want to cast on approximately half of the number of stitches that you need, minus one. For example, if the pattern calls for 77 stitches, you're going to cast on 35. If the pattern calls for 19 stitches, I'm going to cast on 10.
-
With your waste yarn, work 4-5 rows in stockinette stitch, ending at the end of a right-side row (you'll be ready to work a wrong-side row in the next part). Cut your waste yarn.
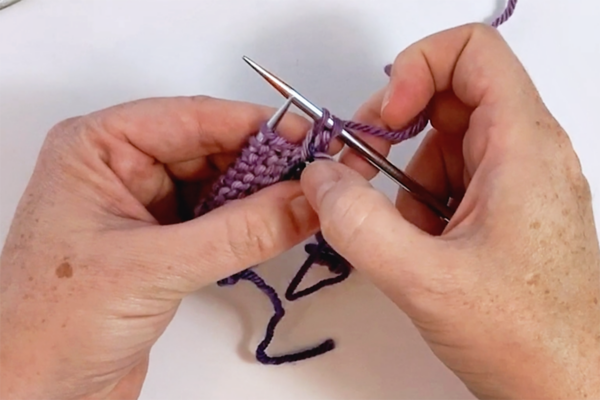
Join The Working Yarn
-
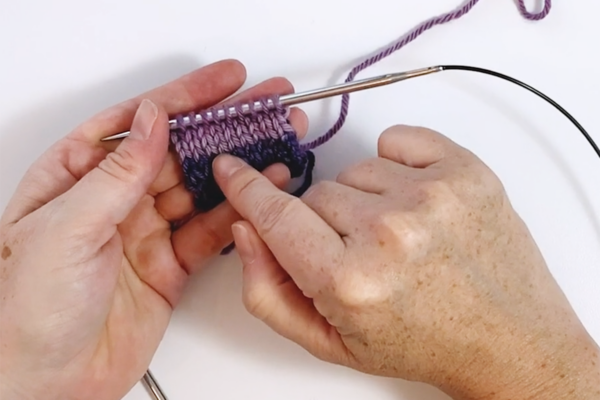
Join your working yarn on the next wrong-side row and purl across. Then, work in stockinette stitch for three more rows (four rows minimum). When you're done, you will have finished a right-side row and are ready to work a wrong-side row again.
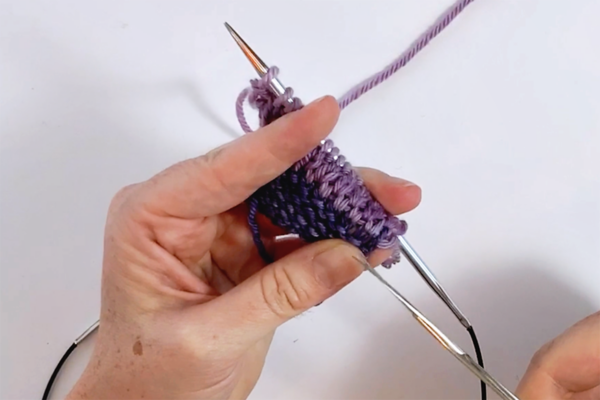
Pick Up Stitches
-
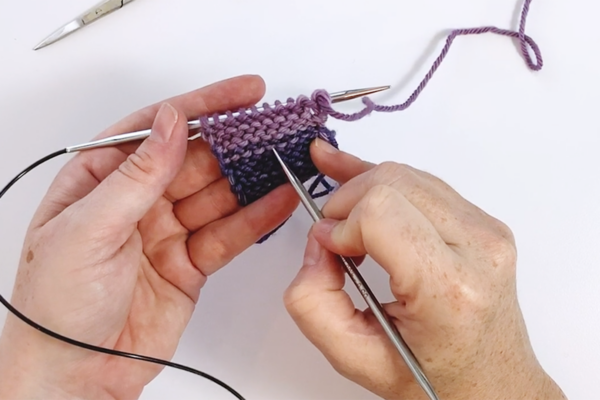
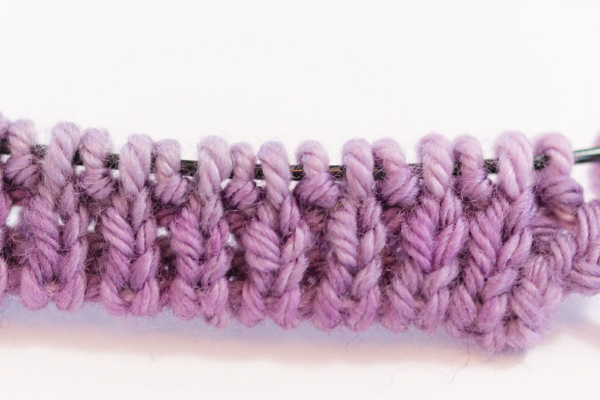
Turn your work to the wrong side and locate the "smile" bumps of the working yarn down below the ridge of the waste yarn where the colour changed. You're going to pick those stitches up, from top to bottom, across the row with your left-hand needle.
-
To work: *P1, pick up 1 "smile" bump of working yarn and knit it through the back loop; repeat from * all the way to the last stitch, then purl the last stitch.
-
-
*Note: that last little smile bump might be tucked in next to the selvedge, so stretch your fabric a bit to ensure you find it. You should have the correct number of stitches for your cast on here.
1×1 Ribbing
-
From here, continue working in the established knit-one-purl-one (K1, P1) pattern:
-
Right-side Rows: *K1, P1; rep from * to last stitch, K1.
-
Wrong-side Rows: *P1, K1; rep from * to last stitch, P1.
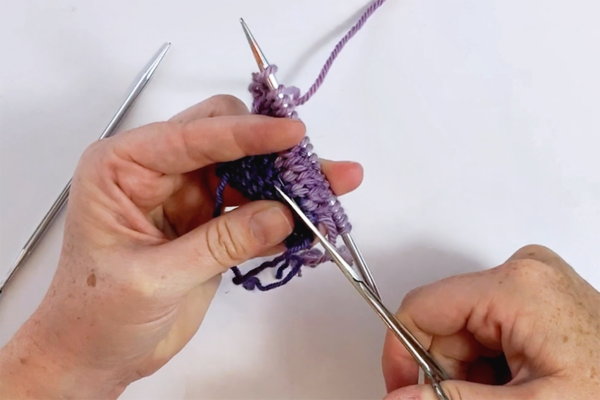
Remove the Waste Yarn to Reveal the Tubular Cast On
-
At some point, you're going to be ready to get rid of that waste yarn and have your pretty edge to look at. With the wrong-side facing you, stretch out your fabric so that you can find where the waste yarn wraps a loop around the V-shaped working yarn. Those are the strands you're going to want to (carefully) cut away to remove.
-
Carefully cut away a few loops at a time, every couple of stitches.
-
Use your knitting needle to help pick out the remaining loops of waste yarn.
-
Now you can continue working on your ribbing and follow the rest of the pattern.
Video
Notes
And that, my friends, is the beautiful stretchy tubular cast on that makes your ribbing look positively seamless.
We would love you to join our online communities. Find us at the School of SweetGeorgia or on our SweetGeorgia Discord channel.
Original publication: August 10th, 2020; First refresh on March 9th, 2023; Most Recently Refreshed: April 24th, 2025
The post How To Knit a Tubular Cast On appeared first on SweetGeorgia Yarns.


