
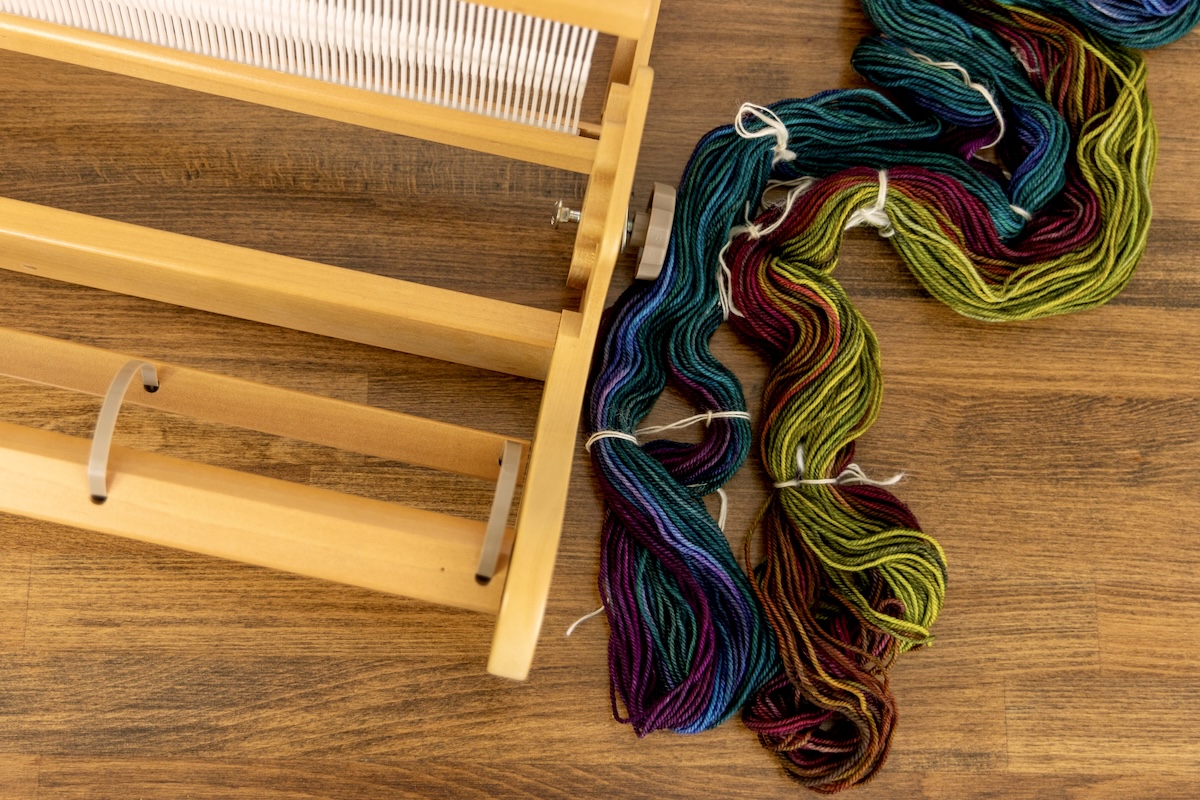
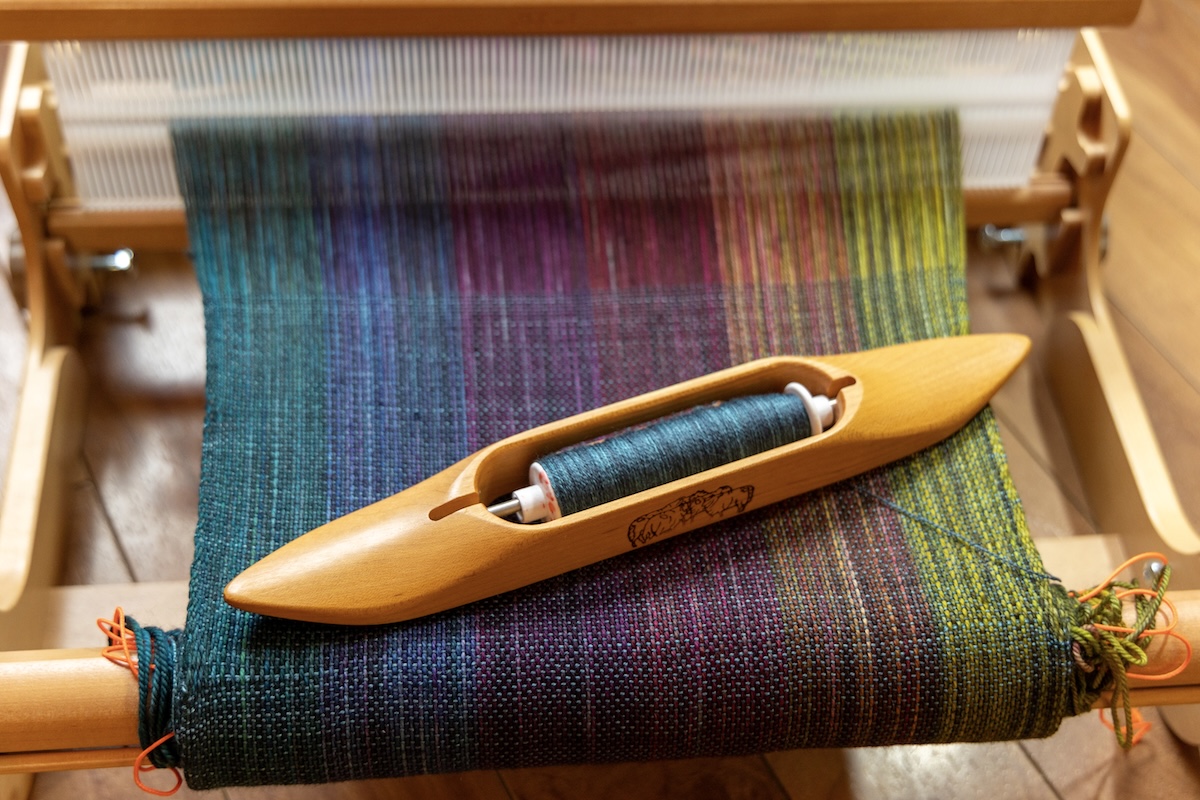
Indirect warping uses a pre-measured warp and is the typical warping method that multi-shaft loom weavers use. Rigid heddle weavers might like this method when they have more than two colours in a stripe pattern, for colour and weave, or other patterns where there are uneven numbers of threads that would make direct warping unpractical. Indirect warping also allows you to use one thread of one colour, it works well in small spaces and gives you even warp lengths and better tension control which can be hard to do with direct warping.
How to Use Indirect Warping on a Rigid Heddle Loom
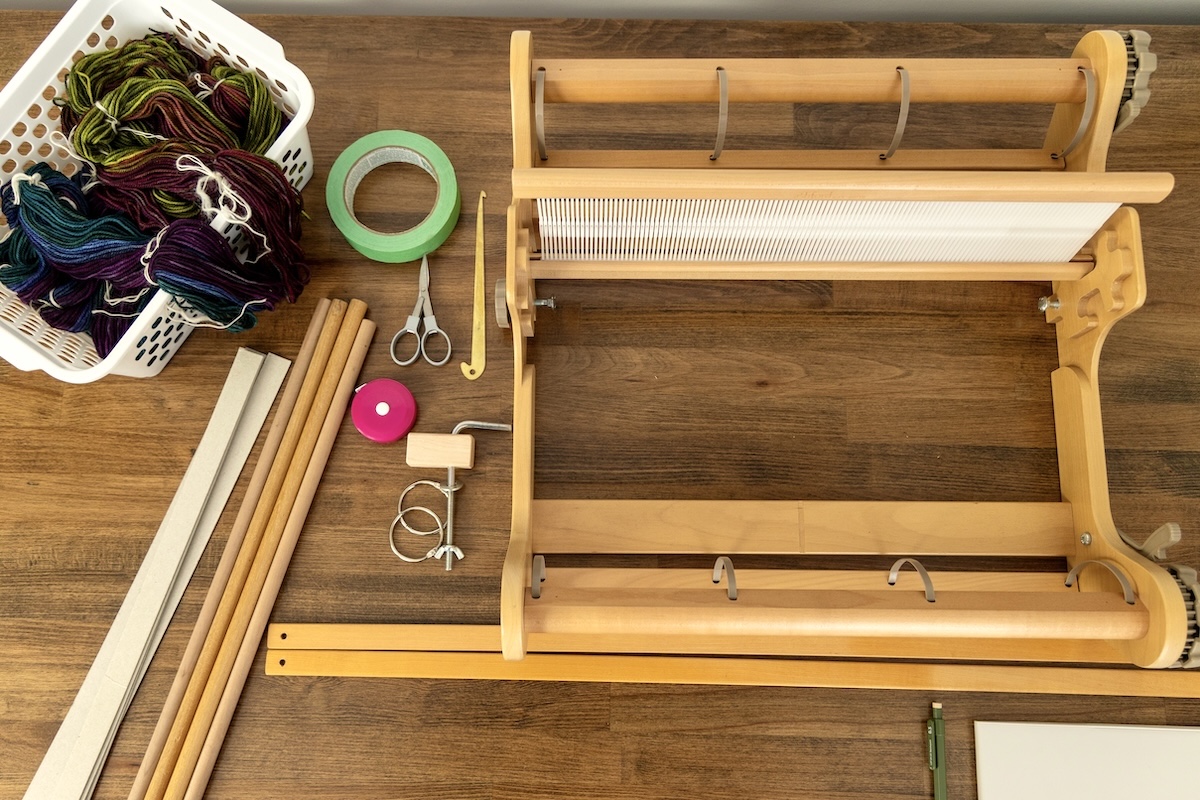
What Materials You Will Need:
- Rigid heddle loom with heddles
- Loom table clamp
- Four wooden dowels
-longer than the width of your loom - Hair elastics or rubber bands
- Scissors
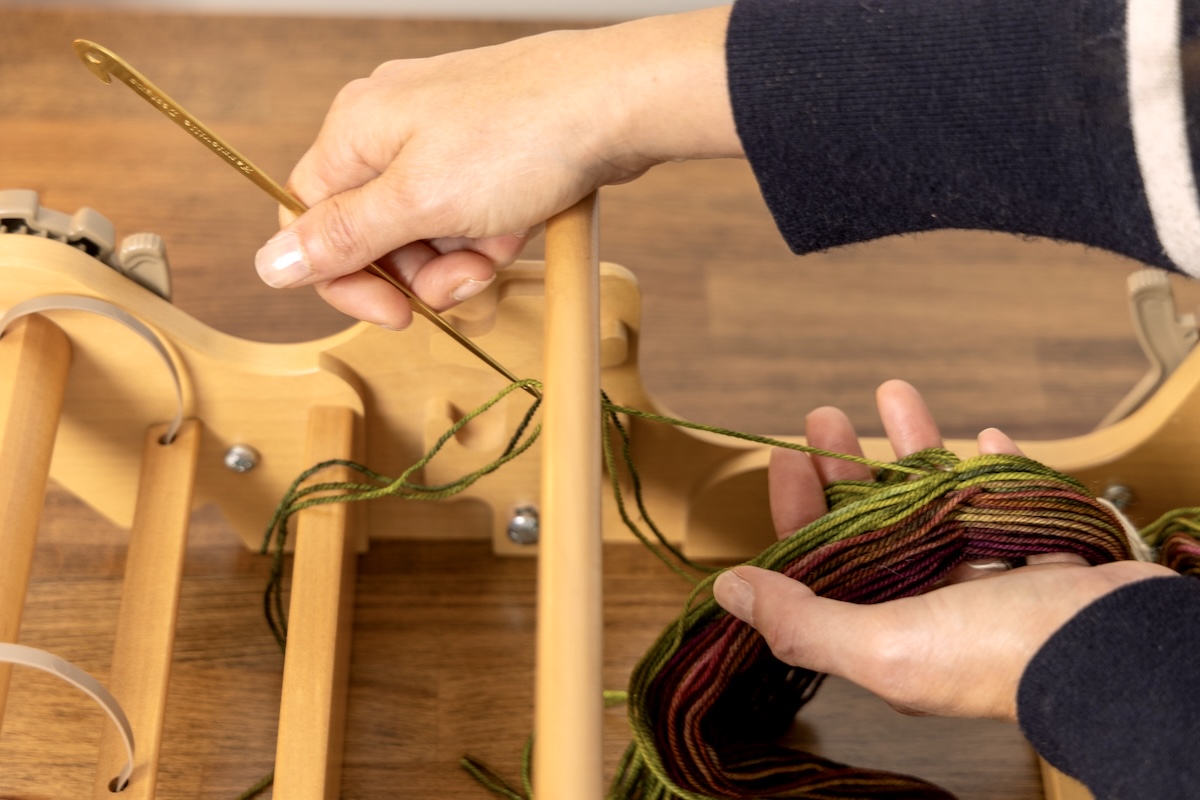
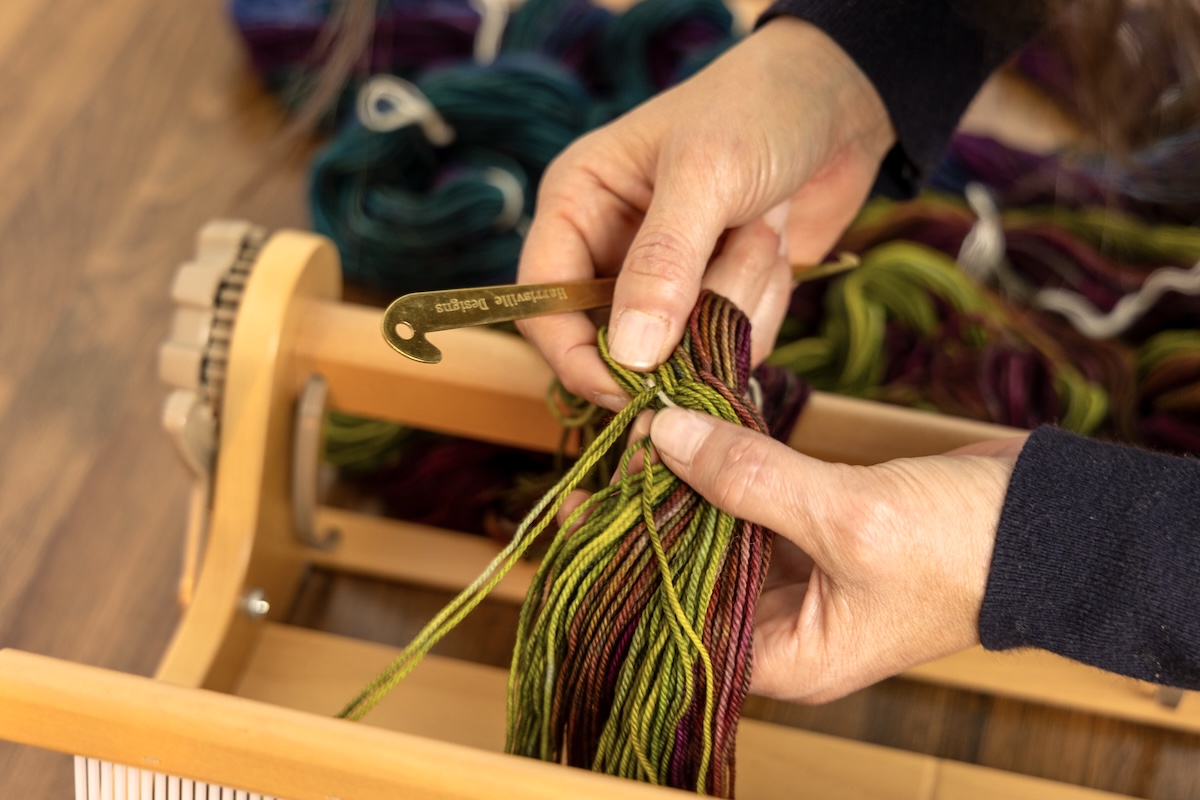
- Sleying hook
- Warp chain
-with the threading cross-secured - Paper for winding on the back beam
- Washi or other removable tape
- Lease sticks (optional)
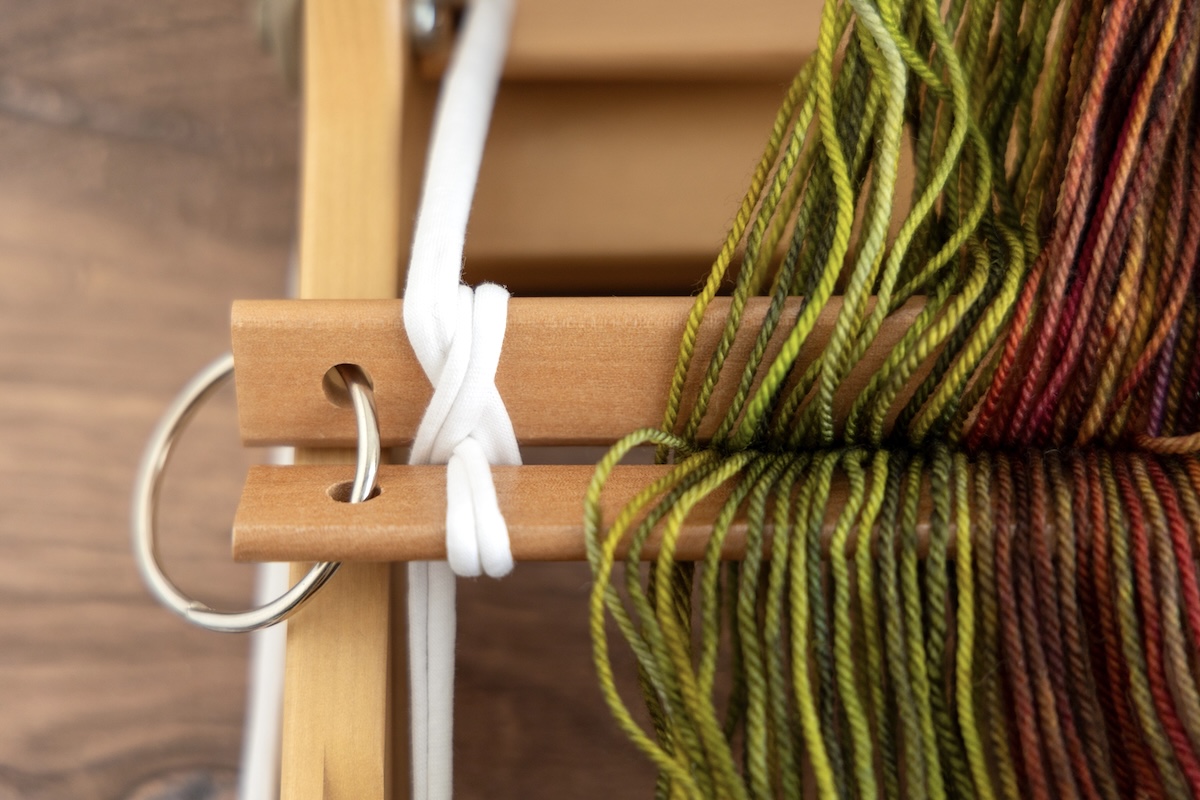
- 1” binder rings
-to join lease sticks together
Please see the Warping Around: How to Use a Warping Mill and How to Wind a Warp for Weaving articles for more information on how to wind a warp. Once you have your warp chain ready there are just a few steps to getting your loom set up.
Setting Up Your Warp Chain
First, secure your loom to the edge of a table with the rigid heddle loom clamp or with bar clamps. Tie part of the unchained end of the warp chain to the front roller to keep it in place while threading. You will want to tie the end that does not have the cross so that you can use the cross for threading. I tie on loosely with a half-basic knot or a slip knot, depending on how thick the warp chain is; one might be easier than the other.
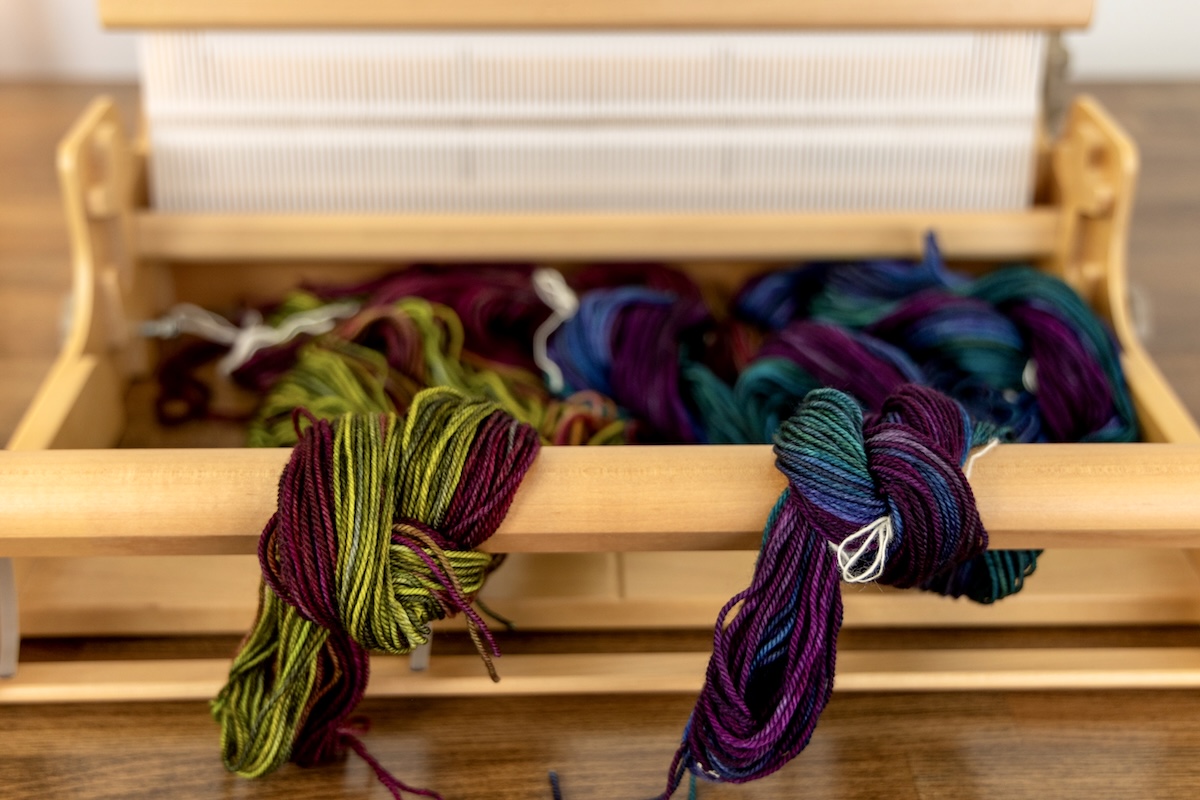
To prepare for threading the slots and holes, hold the chain near the threading cross and cut the loop at the end of the warp, leaving the ties in place. We want to keep the warp cross secured as long as possible, so there is no risk of losing it.
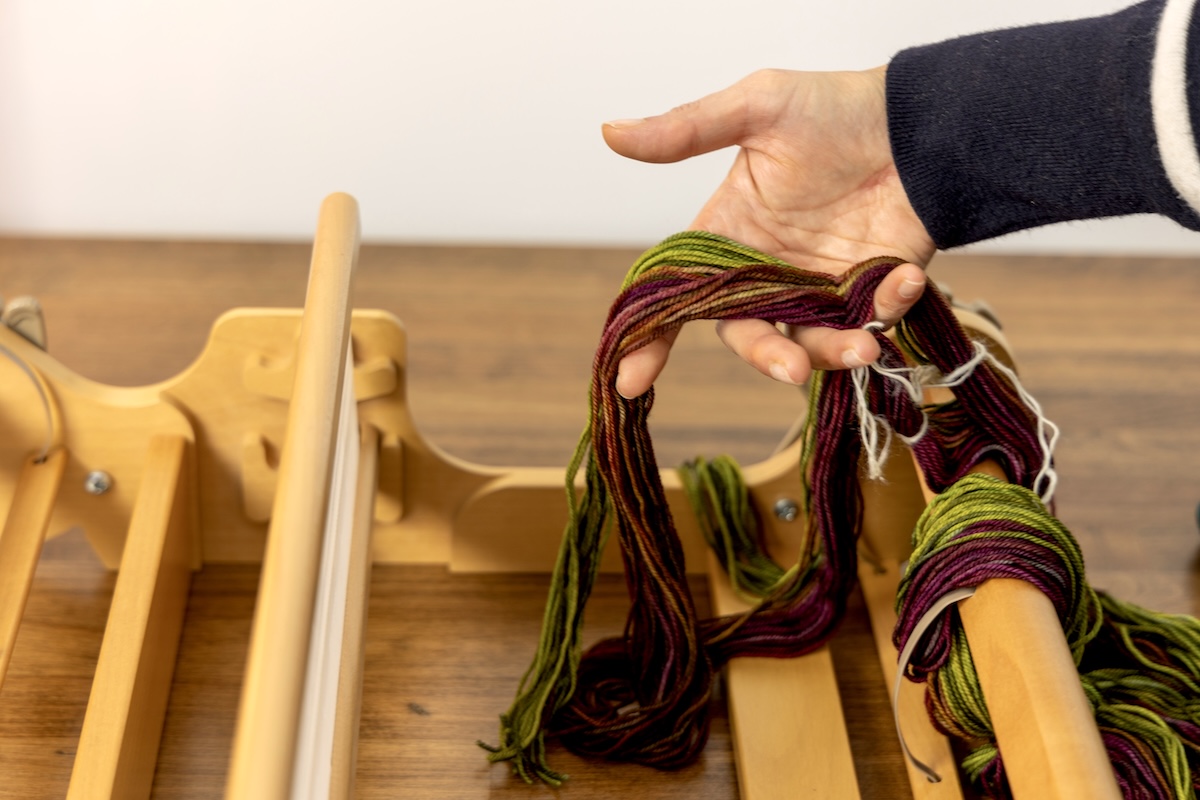
There are a couple of ways to secure the cross if you are worried about it slipping out from your fingers. One method is to use lease sticks to hold the cross behind your hand. You can see Felicia Lo demonstrate the use of lease sticks in her Rigid Heddle Weaving Basics course. Some lease sticks will have holes on the ends so you can secure them with binder rings from the stationery store or use some masking tape to connect them together temporarily once the cross is in place.
When I use a smaller rigid heddle loom, I find that lease sticks tend to get in the way. I mostly hold the cross in my left hand, draping the cross over my fingers to keep the threads in order. For wider looms, lease sticks are very helpful. If you are left-handed, you might want to do the opposite.
Threading the Loom
Now that you have the loose threads in your hand, you will need to thread the loom in one sitting. It really doesn’t work to put it down and pick it up again, so make sure that you are positioned comfortably before you begin and that you will have uninterrupted time to complete all of the threading. You will likely want to unclamp the loom and sit for this part. After threading is complete, you can take a break before tying on.
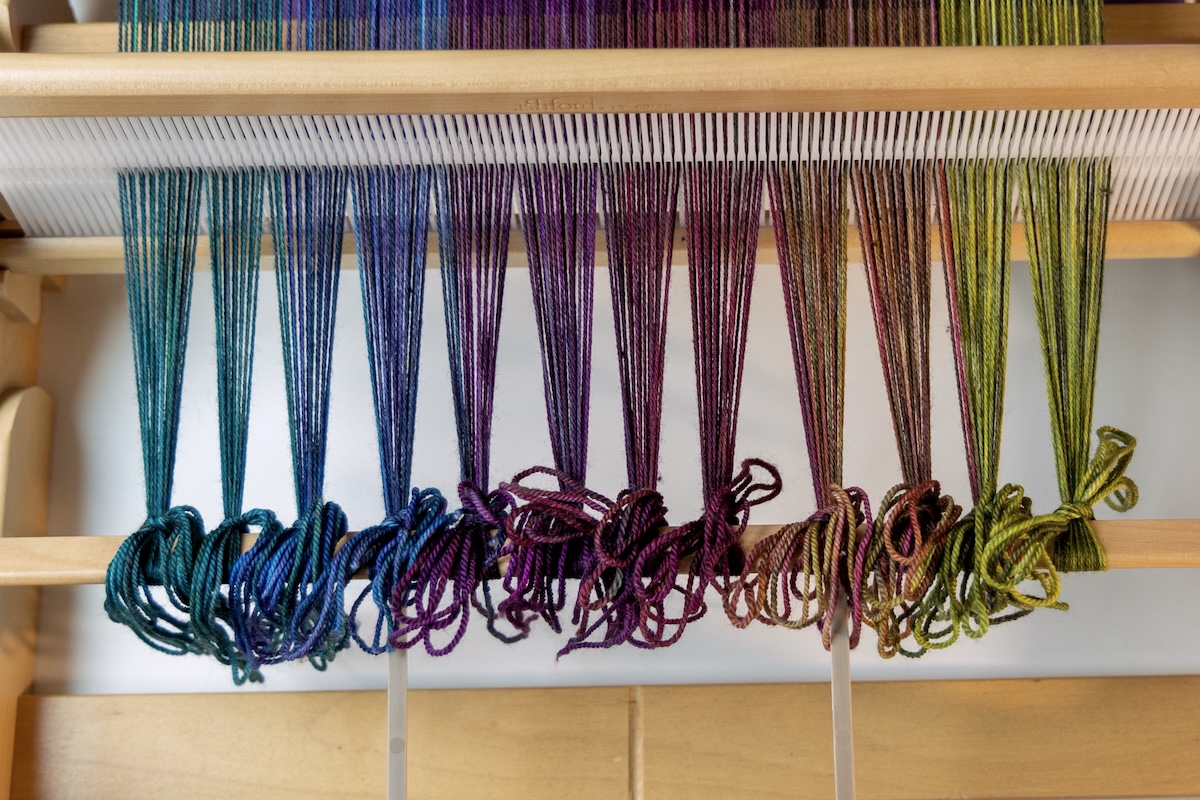
As with all warping methods, we’ll start from one side and move across the loom in one direction, threading both slots and holes as you go with the heddle in the neutral position. Make sure that you centre your weaving. Many heddles will have a centre mark to help you with this.

We’ll move the threads from the front to the back, making sure there is enough warp length that the threads do not slip out of the heddle. Unlike the direct method, you thread slots and eyes (not just slots) sequentially.
For this part, I like to keep the centre cross tie but remove the ties that are on the legs of the cross. If you find this is not enough length, you can remove the centre tie, being careful to keep the cross secure in your hands or on lease sticks.
After you have finished moving across the entire warp, it is a good time to double-check that the threading is correct. Now, you can take a break!
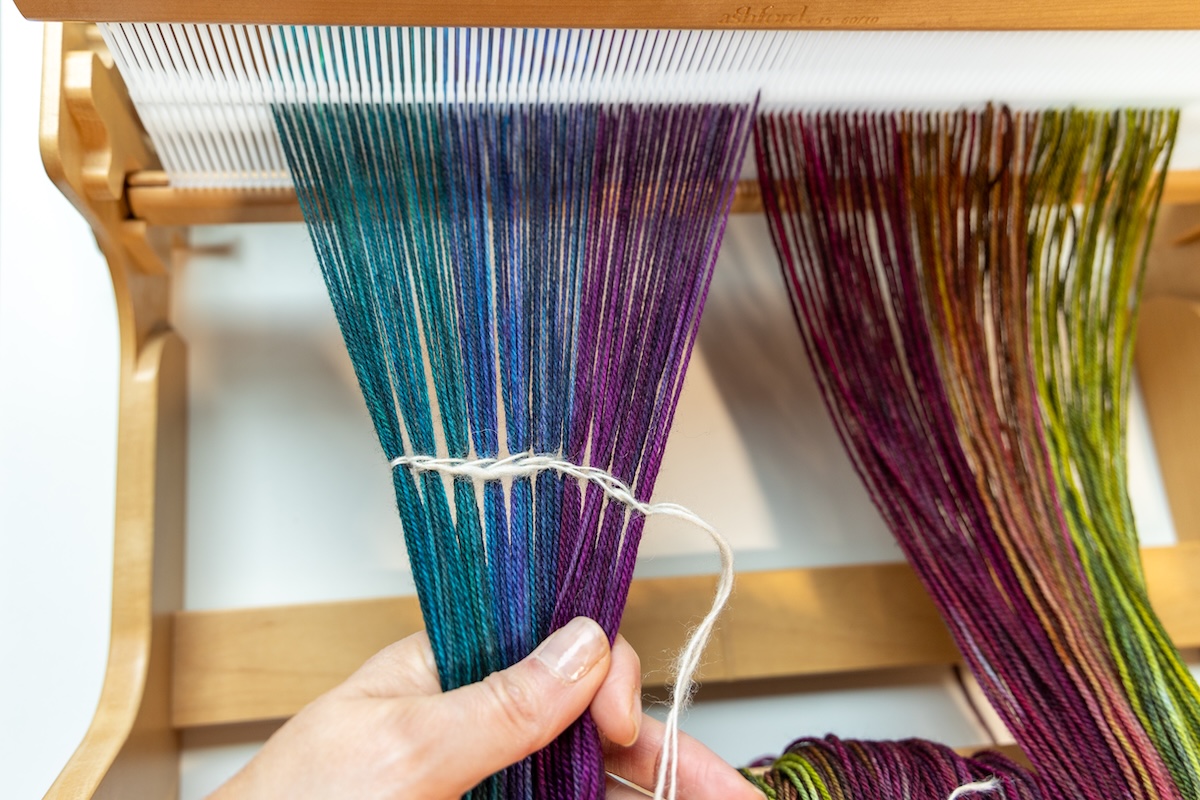
Tying onto the Back Rod
We’re almost done! The next step for indirect warping is to tie on to the back rod. When you are planning your warp, you may want to include an additional 2-3” of loom waste into your warp length calculations to account for this extra knot.
For tying onto the back rod, you can use a simple overhand knot if you don’t need the loom waste for a fringe, and if your warp is long enough, you can simply cut off the ends. If you do need the warp waste for fringe, then a surgeon’s knot is a great option because it is fully removable. Make sure that you are tying on the back rod, not the beam, and that the back rod is going over the back beam.
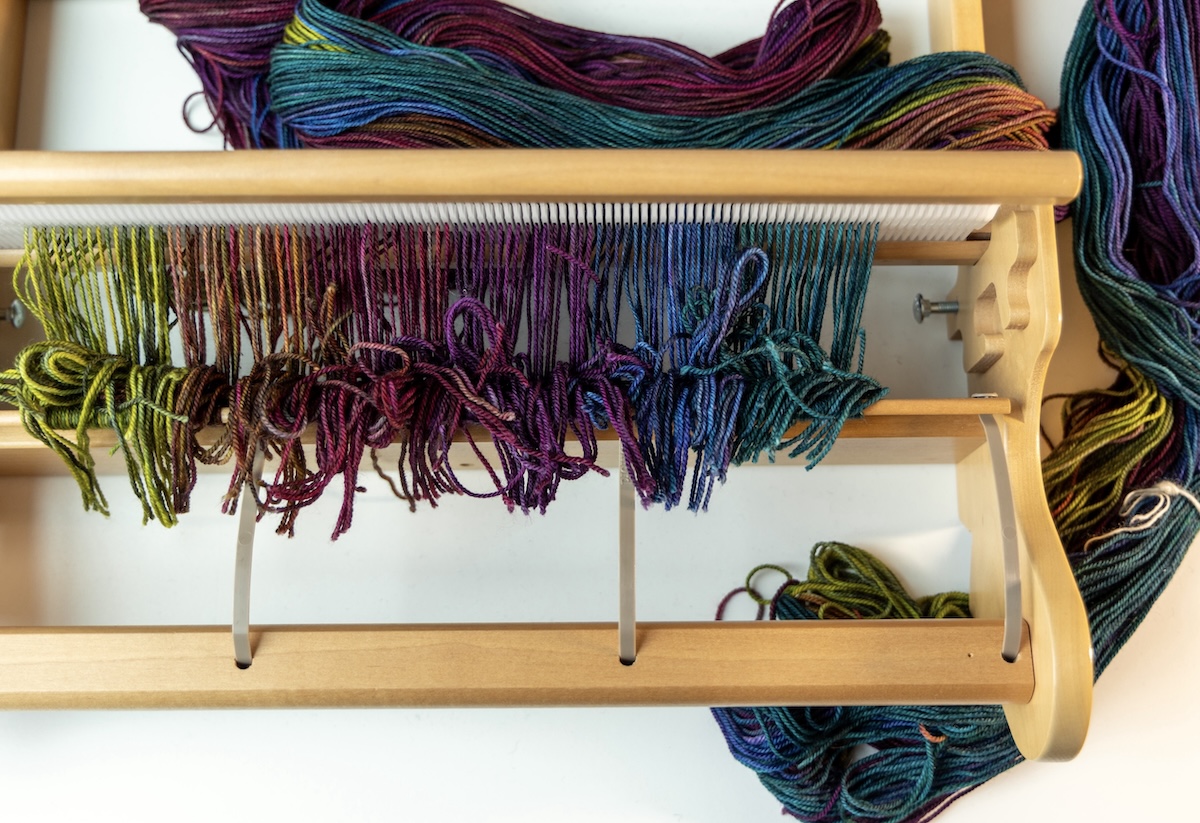
I like to tie even bundles, using my sett as a guide for bundle width. If I am weaving at 10 EPI, I will tie bundles of 10 threads to make 1” bundles. This can also help with managing threading errors, as you can easily see where an error might have occurred with smaller, evenly-spaced bundles.
Winding the Warp Using A Tensioning Device
Next, we will wind the warp onto the back beam. At this point, we will follow the same steps that you would use for other warp winding methods. Remember to use paper on the back beam between your layers. I like to use a bit of washi or masking tape to keep mine from slipping.
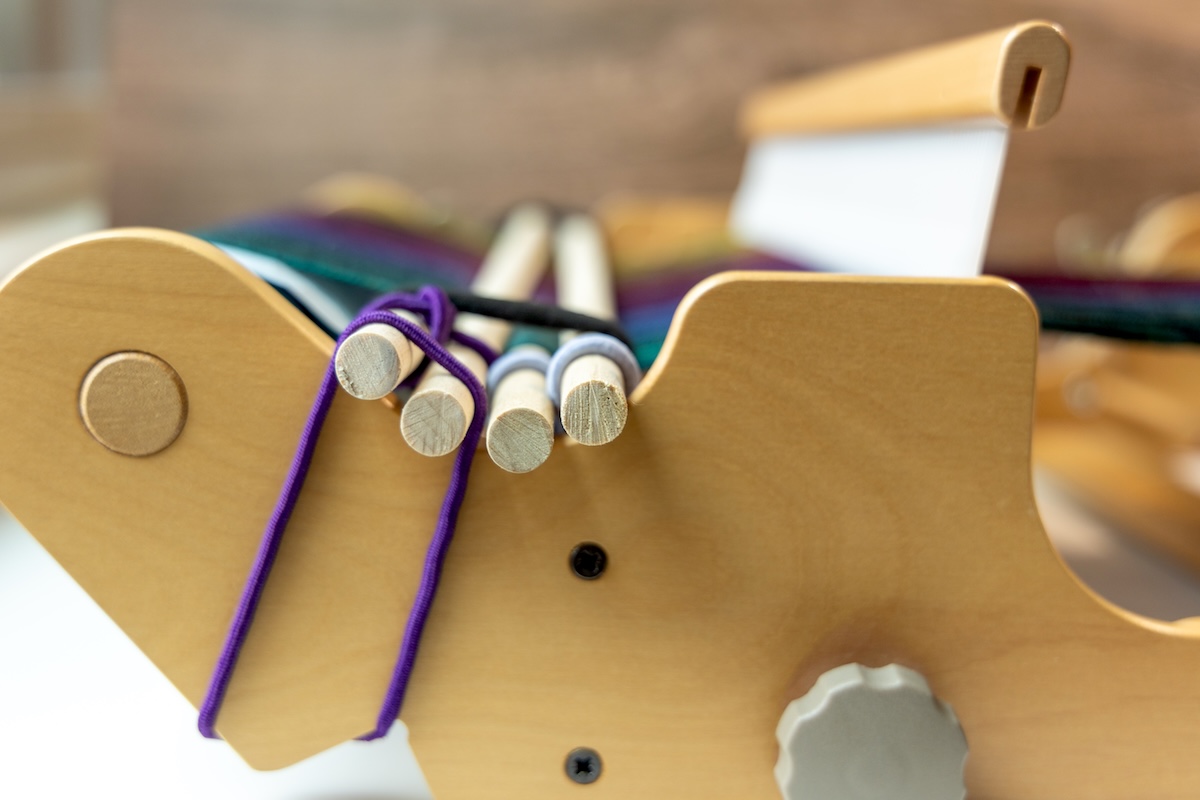
Use your favourite method for winding on or make a simple tool called a tensioning device to help you keep even tension across the width of the warp. This device uses easily found materials: wooden dowels, that are unfinished but sanded, and some rubber bands. The diameter of the dowels will depend on the width of the loom. For larger looms, I’ve used ¾” dowels, and for smaller looms, I like ¼” dowels. Dowels should be slightly longer than your loom width.
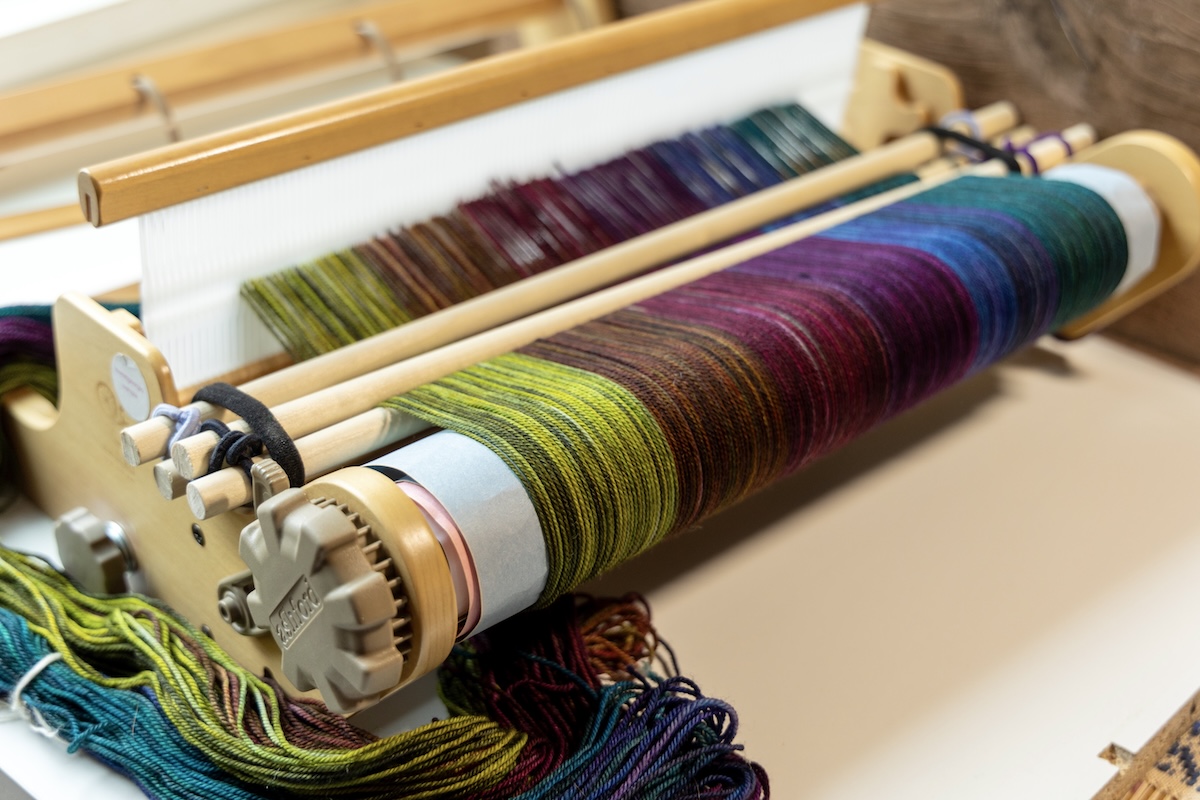
You will also need flat rubber bands like the kind groceries stores use for produce or hair elastics to secure the dowels to each other and the loom. Flat rubber bands decrease the space between the dowels, adding more tension, whereas hair elastics increase the space, giving less tension, so you can choose your tension level by switching out the kinds of elastics you use. For example, for DK weight wool knitting yarn on a 10” loom, I used hair elastics and ¼” dowels. Play with the right combination for your weaving project.
The warp will go over and under the four dowels in the following manner:
- Put two dowels across the loom and secure them with elastic bands to the frame of the loom.
- Place the warp over the top of these two dowels.
- Add two additional dowels over the top of them, alternating with the bottom dowels.
- Secure the last two dowels to the first two and jiggle the setup until it is flat.
If you do not have a horizontal brace on your loom, then you may need to run a beam from the front to the back of the loom over the front and back beams on either side of your loom and attach the dowels to that. There is a little bit of engineering to this method, but I find that it’s worth it to get a nice even tension across the warp.
Finishing the Warp Setup
From this point forward, the warping method is the same as direct warping. You will need to place paper between the layers of warp on the back beam. I like to secure my paper roll to the back roller with a little bit of washi tape.
Once the warp reaches the front beam, you can tie the warp on with surgeons’ knots or your favourite method. My preferred method for tying on the front rod is to use a surgeon’s knot, which I demonstrate in the Clasped Warp and Weft on a Rigid Heddle course at the School of SweetGeorgia.
Just as with the back rod tying, it’s good to get in the habit of making your tie-on bundles the same width as your EPI. Bundles over 1” wide tend to cause problems on the front beam, requiring a lot more header yarn to be woven in at the beginning. This leads to not having enough warp length to complete your project.
Please check out my other courses at the School of SweetGeorgia, including Clasped Warp & Weft on a Rigid Heddle, Two-Heddle Weaving, Colour & Weave on a Rigid Heddle, and Lace with Pick-Up Sticks on a Rigid Heddle for content on plain weave and more on a rigid heddle loom.
The post The Indirect Approach: Rigid Heddle Warping appeared first on SweetGeorgia Yarns.


