
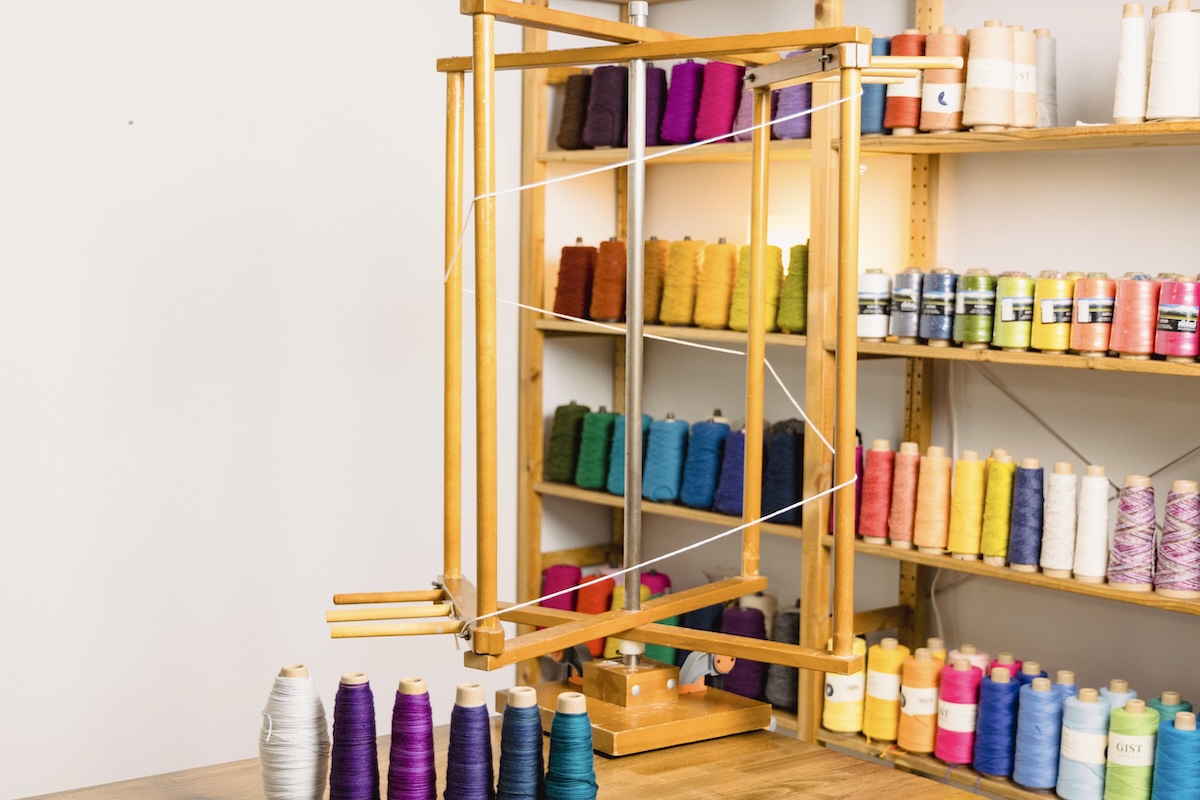
For rigid heddle and shaft loom weavers alike, a warping mill, also known as a warping reel, can be a great addition to your weaving studio. There are various options, from smaller, foldable tabletop mills to large-scale vertical mills and folding horizontal mills that sit on the floor. If you have the space for a warping mill and want the flexibility to put on warps that are longer than a few yards, they can be a great tool to increase your warping comfort and help speed up the process.
How to Choose Which Mill to Use
Maximum Warp Length
The diameter of the mill determines the length of the warp that you can make. For example, the Leclerc Vertical Tabletop Warping Mill, used in this article, can warp 2 yards per rotation for a maximum of 22 yards, whereas the Leclerc Vertical Floor Warping Mill can measure 4 yards per rotation for a maximum of 50 yards. By comparison, the Schacht Horizontal Warping Mill can measure 2 yards per rotation for a maximum of 18 yards and can be used on the floor or a table.
When choosing a warping mill, consider the maximum length of warp you can put on your loom. The length of the warp that you can put on a loom depends on the distance between the front warp beam and the back beam. You don’t want to have a warp that comes over the back beam, meeting a warp that is wound onto the roller. On a rigid heddle, this distance is quite small but on a shaft loom, it can be larger. Ashford rigid heddle looms for example can handle 5 to 15 yards of warp depending on their width. In general, the wider the loom, the longer the warp it can handle as the warp beam-to-back beam distance usually increases as looms get wider.
So, before choosing a warping mill, you might want to take some measurements on your loom to see what kind of mill you need, or if a warping board might be a better option.
Ergonomics and speed
The warp length is not the only consideration for using a warping mill. One of the reasons I prefer a warping mill over a warping board is not because it can measure longer warps, although it’s nice to have that flexibility, but because it is a more fluid motion. I find this makes the process both faster and more ergonomic than a warping board. I have a foldable tabletop mill and I can set it up to exactly the right height that I need it to be with a cone or spool holder on the floor next to the table, warping 2-4 threads at a time.
Since my studio is small, I keep the mill folded up on a shelf and measure a few warps at a time when I set it up. I find this setup works well for me, but you might have different needs. Hopefully, this article will help you decide if a warping mill is a worthwhile investment for your practice.

Before Choosing a Mill, Consider These Factors:
- Do you often warp uneven numbers of warp threads, stripes with more than two colours or longer warps? If not, a warping board might be enough.
- What is the maximum warp length of your loom? Shorter warps (less than 8 yards) can generally be created on a warping board.
- Think about how much space you have. Do you have room for a floor model or is a tabletop model better for your space? Do you want a larger mill but need to put it away when you are not using it? Then a folding mill might suit you better.
How to Use a Warping Mill
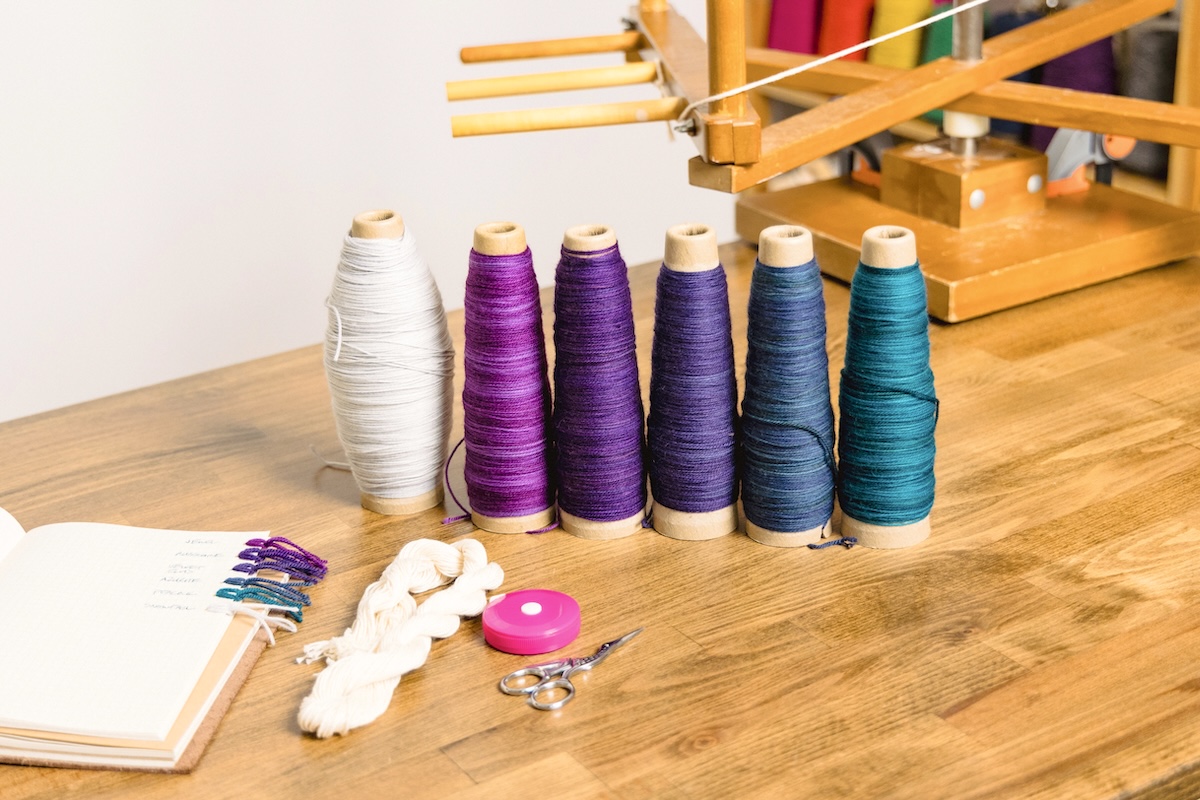
What Materials You Will Need:
- Warping mill
- Weaving yarn
- Measuring tape
- Smooth waste yarn, such as 8/2 cotton
-for guide and counting threads, as well as any choke ties
- Scissors
- Cone holder, spool holder, or vessel for yarn
- Two bar clamps
-dimensions to fit your loom/table configuration if using a tabletop mill, explained below*
Setting Up the Warping Mill
For a tabletop mill, position it near the corner of your table and secure it with one or two bar clamps. Often a mill will have rubber feet on the bottom to keep it from slipping. I have found this is not always enough of a security measure, so I always clamp the mill in place as well.
*When choosing bar clamps, make sure that they are long enough to clamp the table and the mill together. Place the mill on the surface and measure the table and the mill together to account for any height added from rubber feet. Use this combined measurement when choosing clamps.

While many mills have rubber feet, I find clamping adds extra stability.
Set up your cones/skeins/spools of yarn so that they feed easily onto the mill. You’re ready to wind your warp!
Setting up the Guide Thread
A guide thread is the path you will take every time you pass the yarn between the top and bottom pegs of the warping mill. Make the guide thread from a smooth piece of waste yarn in a contrasting colour. The guide thread should be the length of your warp plus 6-10” to accommodate a loop that you will tie on either end. Tie a knot at each end, making a loop large enough to go over the pegs on the mill. These loops should be outside of the warp length measurement as the knot will mark the beginning and end of your warp.
You will be spinning the mill as you make the warp. I am right-handed and usually spin the mill counterclockwise with my left hand while holding the warp threads with my right hand when moving from the top to the bottom. Beginning at the top, I start with the first loop on the peg to my right. Then, keeping the guide thread taught, but not with a lot of tension, wind it around the mill until the second loop reaches the peg at the bottom. The number of spins will depend on the size of your mill and the length of your guide thread. Now you’re ready to wind your warp.
Making the Warp & Cross
For the first pass, I usually start at the bottom of the mill, going over the first peg and under the second peg, and then wind around the mill, taking the path of the warp that was set out by the guide thread, and up to the top peg, where I repeat going over the first peg and under the second peg.
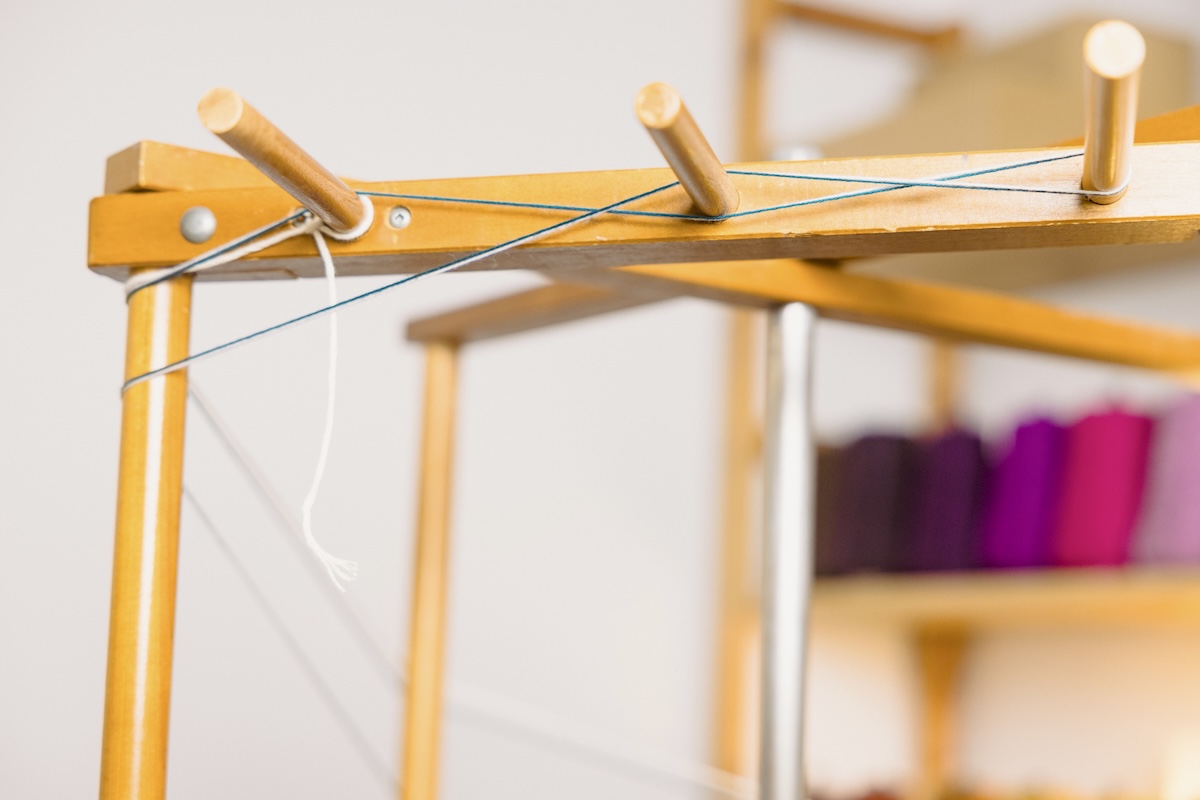
For the second pass, I wrap around the top peg, go over the first peg and under the second peg, which creates my threading cross, and follow the guide thread back down, spinning the mill in the opposite direction. When I reach the bottom, this time, I repeat going over the first peg and under the second peg. The threading cross is important for keeping our threads in order when transferring the warp to our loom, so whatever you do, don’t skip this step!

Warp Width
Continue in this manner until you have wound your entire warp. There are a few situations that might require you to split the warp into narrower sections:
- You might notice that the warp builds up on the bottom peg. This creates a slight difference in length. This usually isn’t enough to cause significant discrepancies in the warp length but it’s a good idea to be aware of this build-up.
- You may be limited by the length of the pegs that come with your mill.
- Sometimes, if you have different colour sequences or different materials in your warp, it’s easier to wind them separately.
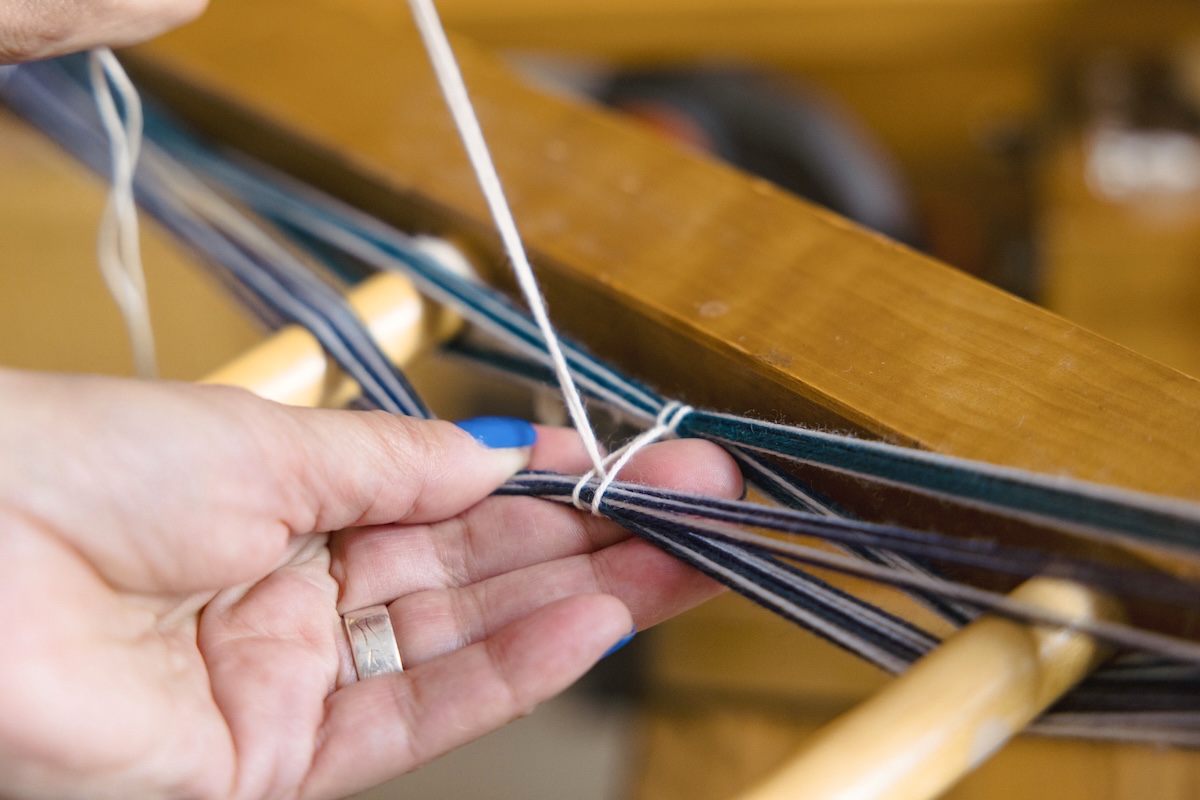
Tying Counting Threads
While you are winding the warp, it can be helpful to tie what is called a counting thread to keep track of where you are in your warp. This thread will stay in the warp when you transfer it to your loom so you can use it to help keep your warp in order when threading as well. You can add the counting thread as you go, or you can add it after you have finished making the warp but before you remove the warp from the mill. In the images below, I added the counting thread as I went.
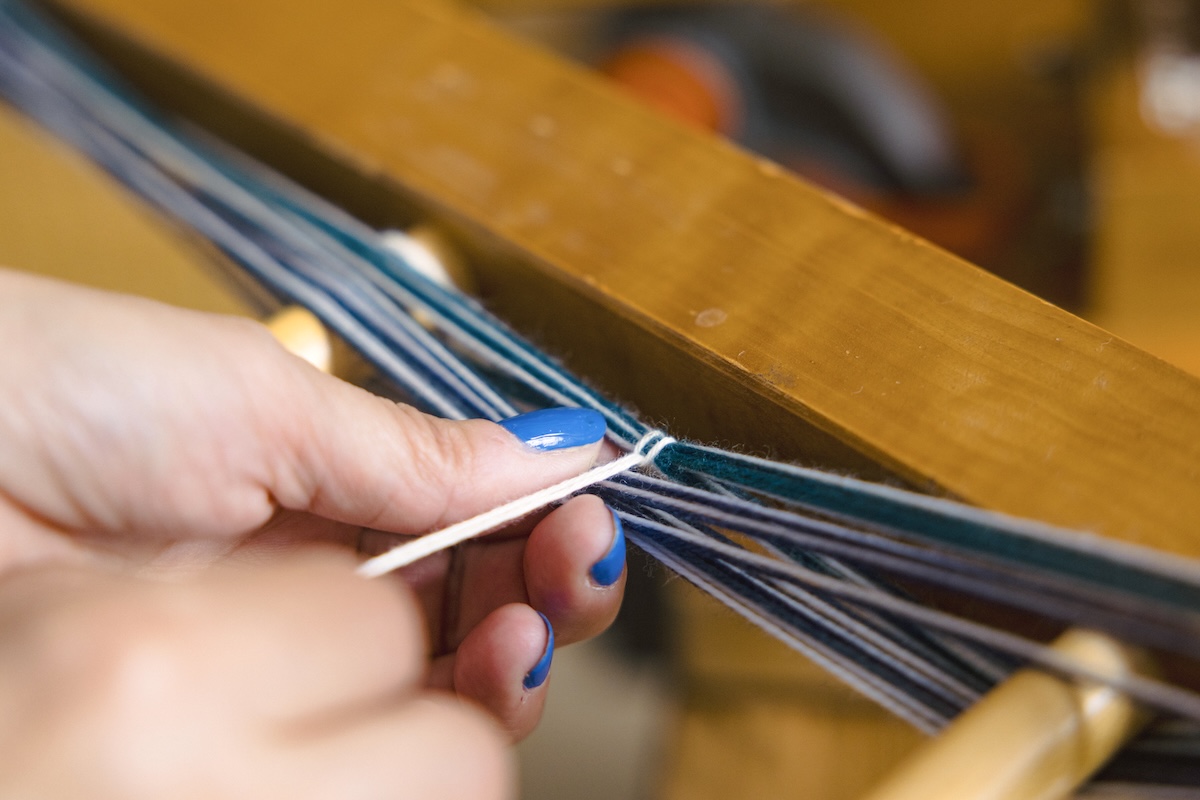
Then, take the tails around the first group of threads, bring the tails through the loop and tighten. I usually place my counting thread at the bottom so that it doesn’t interfere with the cross at the top.
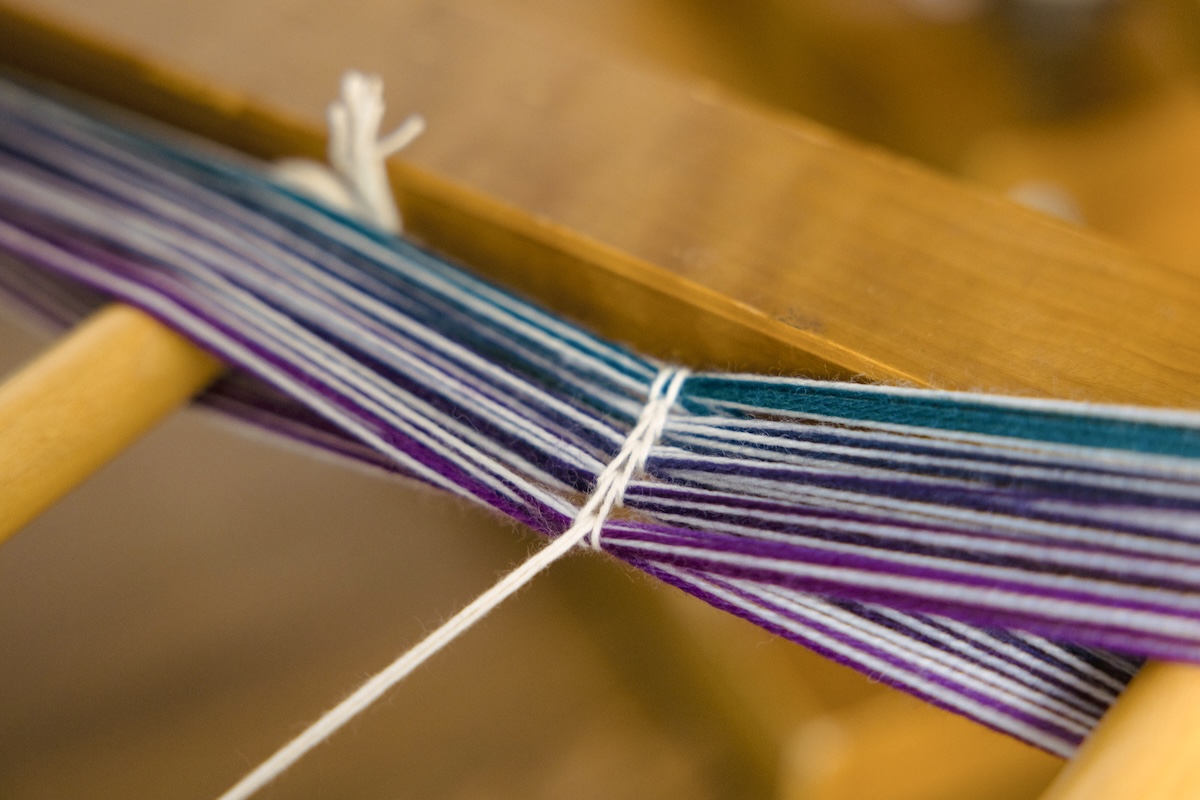
Securing the Warp and the Cross
Before you remove the warp from the mill, you will need to make sure that you add choke ties around the threading cross at the top of the mill. I use a smooth yarn and like to tie a bow rather than a knot so I can easily remove it, but it stays secure. I tie around all four sides of the threading cross, one in the middle of the warp, as well as one at the beginning.
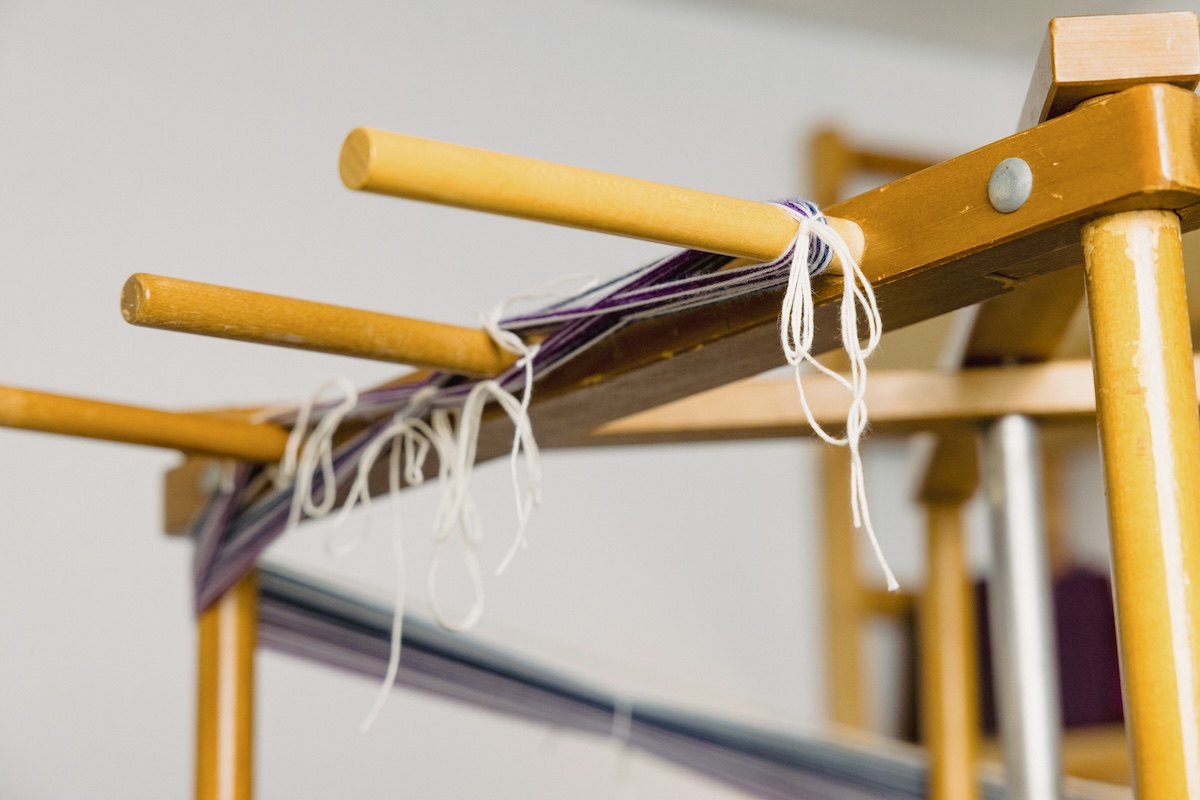
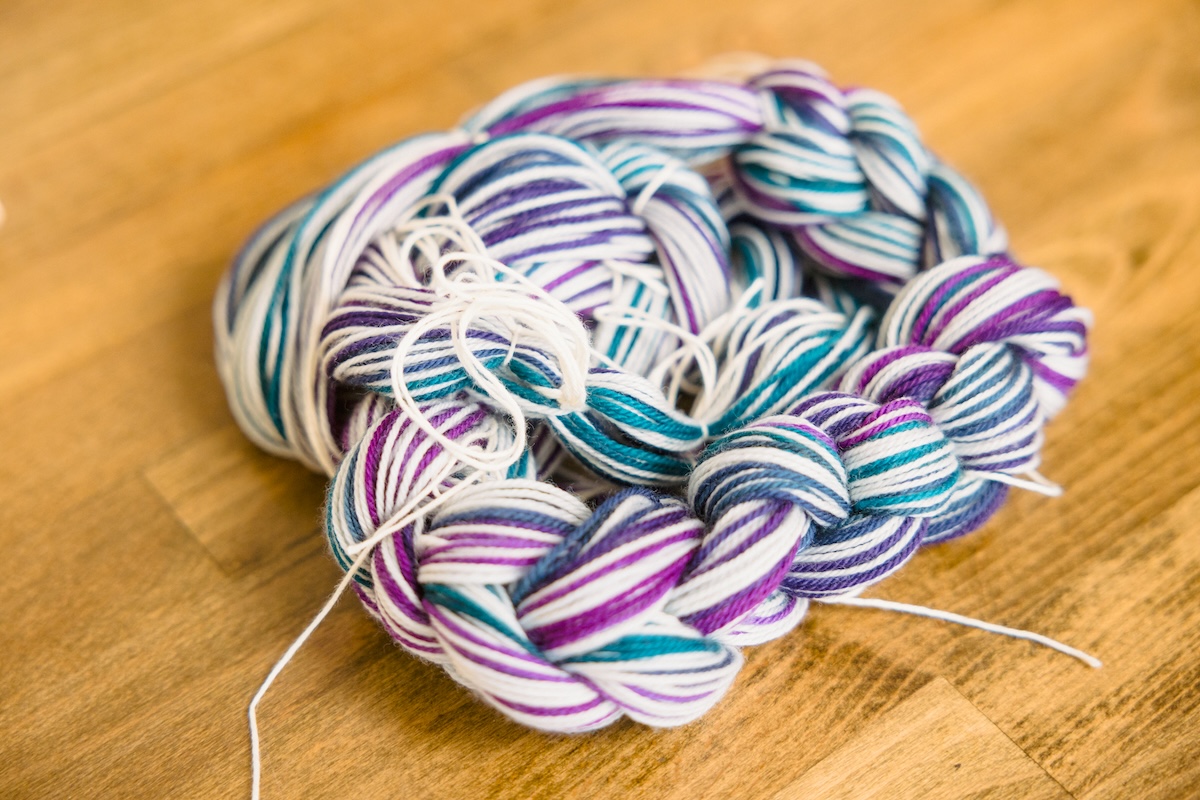
Warp Chains
Now, it’s time to remove the warp from the mill. But we want to make sure our threads don’t get tangled when we take it off. I follow the advice of Saltspring Island weaving instructor, Jane Stafford, who does not add any additional ties but rather makes a tight warp chain, but you can also do both. If you feel more cautious and this is your first time using a warping mill, you might want to add additional choke ties at 2-foot intervals over the length of the warp while it is still on the mill.
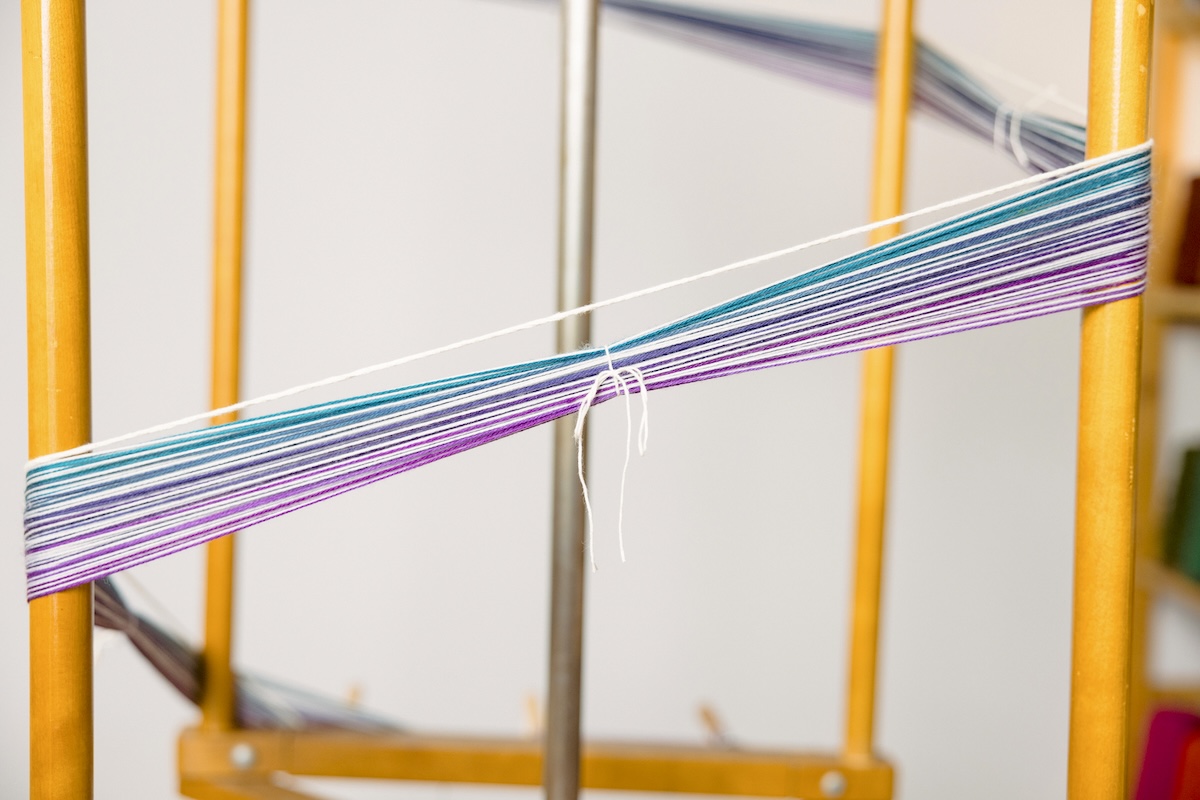
Starting at the bottom of the mill, pull out the first peg that the warp wraps around and put your hand through the loop that is formed. Then, grab the warp that’s still on the mill about 6” above and pull it through the loop. Now, put your hand through the new loop that is formed and pull the warp through again, forming a new loop. Repeat this motion until you reach the end of the warp.


Next steps
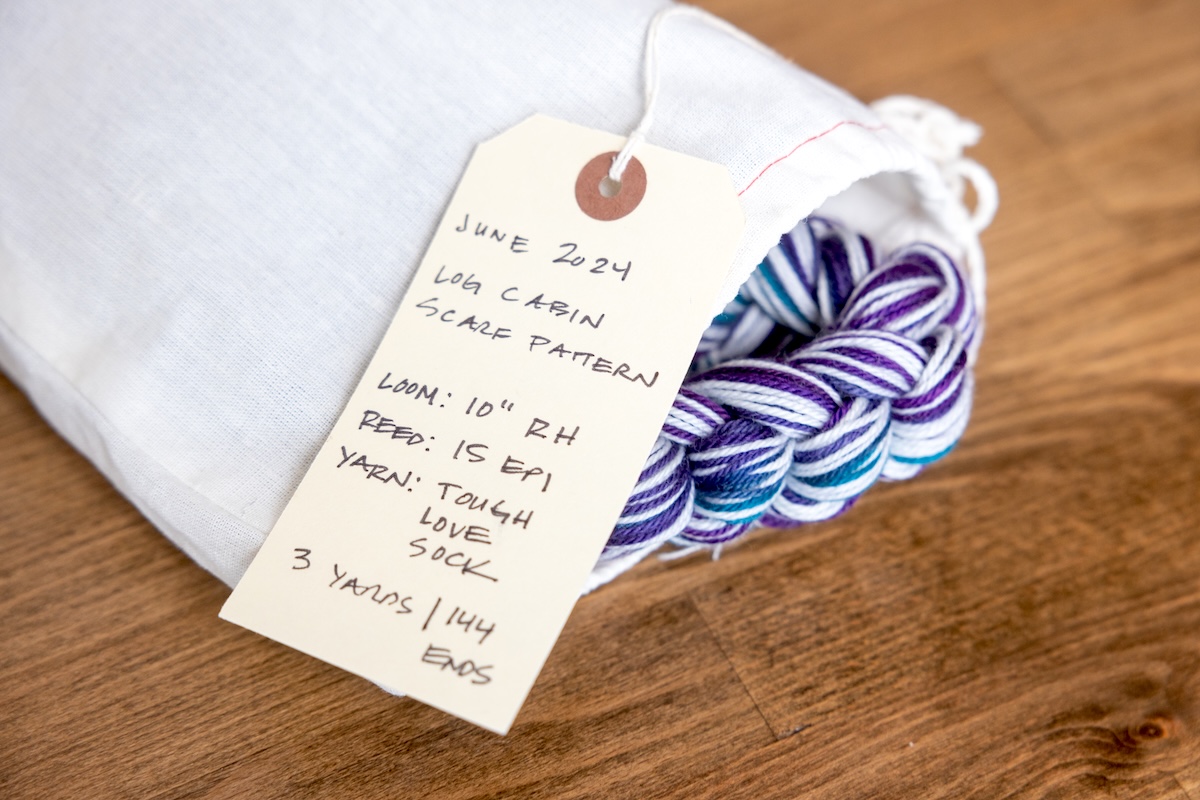
Now that the warp is off the loom, you have some options. You can go ahead and warp your loom, or you can save it for later. Some weavers keep warp chains on a peg on the wall of their studio. I like to keep mine in a cloth bag with a tag that tells me more about the project. I make sure to include all the pertinent details such as the number of threads, warp length, date, which heddle or ends per inch I’m using, and information about the yarn. You could also keep any drawdowns or yarn packaging in the bag as well so that when you are ready to begin weaving, you have everything you need.
For more warping inspiration, check out some of my rigid heddle courses at the School of SweetGeorgia. There, you will also find a video demonstration of a horizontal warping mill from the Essential Weaving course with Felicia Lo.
New to Weaving & Interested in Getting Started?
Sign up to download our free Guide to Weaving Looms. This little guide is just about the absolute basics of what you need to get started with weaving looms and other weaving equipment. You’ll get the PDF download and be subscribed for more news from SweetGeorgia.
The post Warping Around: How to Use a Warping Mill appeared first on SweetGeorgia Yarns.


