
With the resurgence of enthusiasm for spinning on spindles, I am happy to report the art and craft of making yarn with these noble tools is alive and well. Along with this renewed interest in spindle spinning, we are seeing many “learn to make yarn with a spindle” classes online, through guilds, workshops at fibre festivals, and at local yarn stores. The primary focus of the workshops seems to be on how to make singles yarn. The focus of this article is how to get from singles on your spindle to plied yarn in your hands.
Below I offer some tips for managing both your spindles and singles during plying. I also outline the various options I am aware of and offer commentary on the advantages of, and challenges with, the different approaches.

General Plying Considerations
When I choose my plying strategy, I first think about my situation. Is this a quick sample yarn? Have I just finished exploring a new spindle or a new fibre blend, and want to see what the singles look like plied back on themselves? What kind of yarn do I want to make? How many plies do I want for my yarn? Do I have access to extra equipment? With the variety of options for storing and managing singles yarn, I can mix and match and create a plying approach to suit my situation and yarn needs. Let’s explore our options further.
In general, plying is the action of taking two or more singles and adding counter twist, also known as ply twist. For example, if the singles yarn were made with a clockwise twist (to the right – also known as Z twist), it would be plied with a counter-clockwise twist (to the left – also known as S twist).
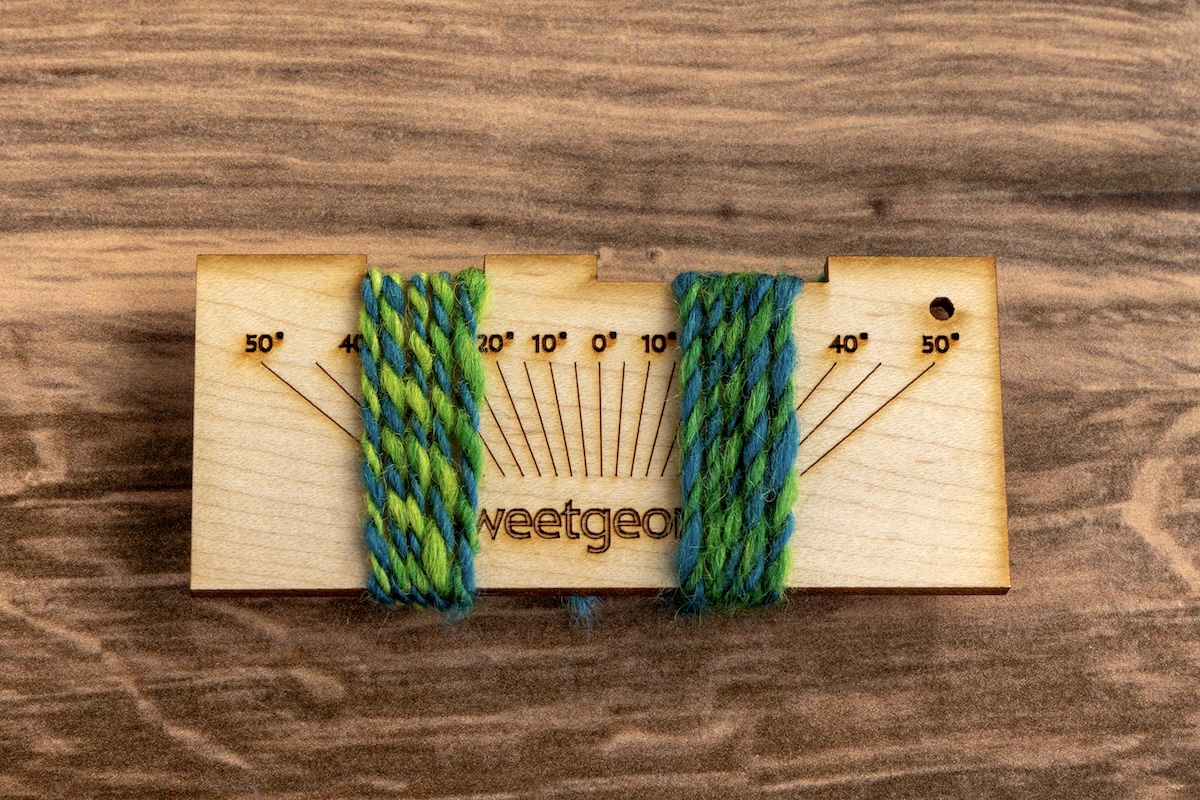
The addition of ply twist not only adds strength to the yarn but also balances out the twist energy from the singles yarn, which makes the yarn easier to work with. Plied yarns also minimize surface exposure of the yarns. As they twist around each other, they overlap and cover each other at intervals. This helps plied yarns withstand surface abrasion better than singles yarns.
For plying, you are taking the singles and combining them to create multi-ply yarns. To help make plying a relaxing activity, choose a plying setup that serves you well. The main considerations when plying spindle spun yarn include how to remove the singles yarn from the spindles, finalizing the plying strategy, and method for adding ply twist using a spindle, spinning wheel, or electric spinner.
Step 1: Removing the Singles
Removing singles from spindles involves holding the spindles securely. Keeping them under tension during this process minimizes tangling. Tension is key throughout the entire yarn-making process, from removing the singles right through to plying. In the book Respect the Spindle, Abby Franquemont calls this “Yarn Management”.
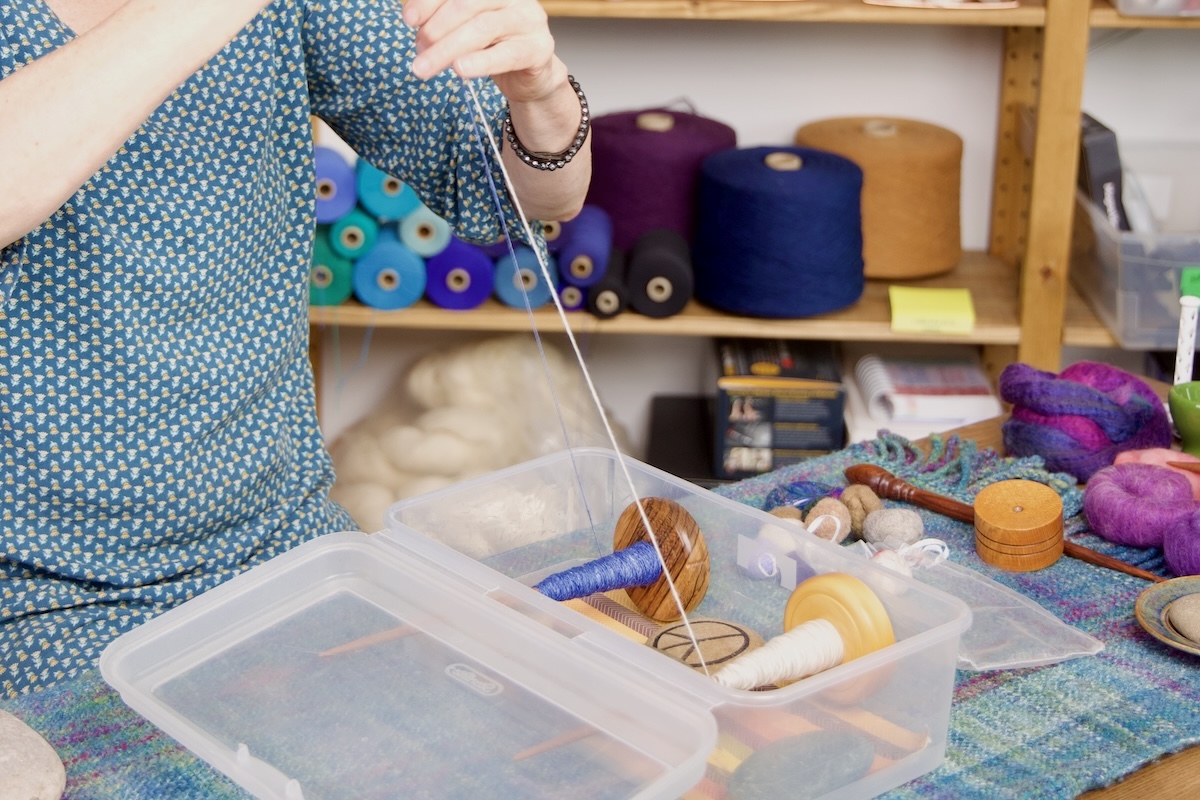
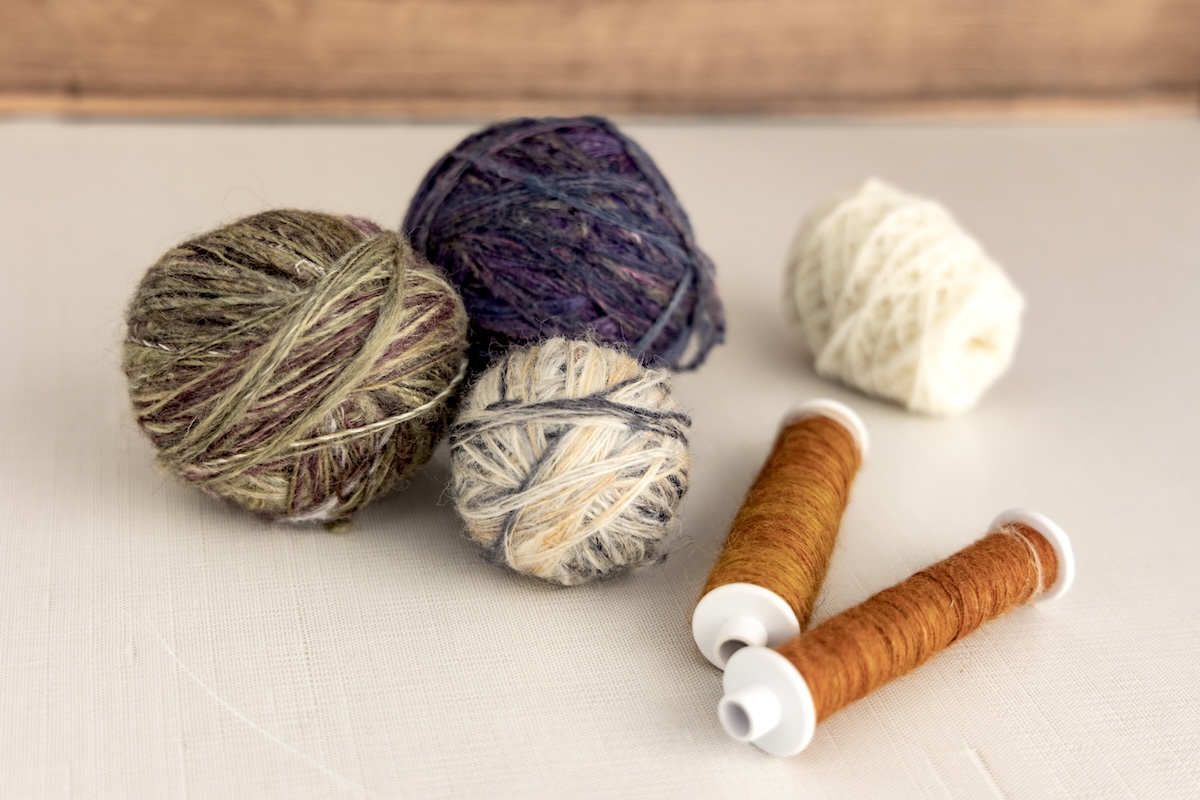
The singles are wound off onto a plying ball, centre-pull ball, or a weaving bobbin. The best way I have figured out to hold my spindles securely is to use a plastic basket for the lazy kate. A lazy kate can be as simple as a shoebox or a plastic basket with holes. The lazy kate supports my spindles while the singles are drawn off the side of the spindle. Drawing the yarn off the side of the spindle neither adds nor removes twist. When winding off the spindle, take care to control the speed at which the singles are pulled from, or tangling can occur.
I find the look of my finished yarn is better when I take the time to remove the singles yarn from the spindle, transfer the singles to a storage package(s), and ply from the storage package(s). And there is an added benefit to this necessary task. When the yarn is transferred from the spindle to a storage package, the twist that has been put into the singles has a chance to somewhat even out as it is being wound. It’s known as conditioning the yarn. When I have the opportunity, I wind my plying balls about a metre or two away from the spindle in the lazy kate to increase the distance.
Step 2: Plying Strategy
To set up for plying, I must decide whether the yarn will be two-ply, three-ply or more. This helps me know how to set up my plying packages. For example, if I want to make a three-ply yarn, I will wind a three-strand plying ball, or if I am aiming to chain ply, I will only need a single-strand plying ball.
Step 3: Adding Ply twist
Ply twist is added in the opposite direction to which the singles were spun. Most often, spinners “spin to the right and ply to the left.” If all your singles are loaded onto one plying ball, your focus can exclusively be on getting the amount of ply twist that you desire into the yarn.
Removing the Singles from the Spindles
Below are various approaches you can take to remove the yarn from spindles. Please note I have listed the techniques in order of my preference.
Using a Lazy Kate to Tension The Spindle(s) to Wind a Plying Ball
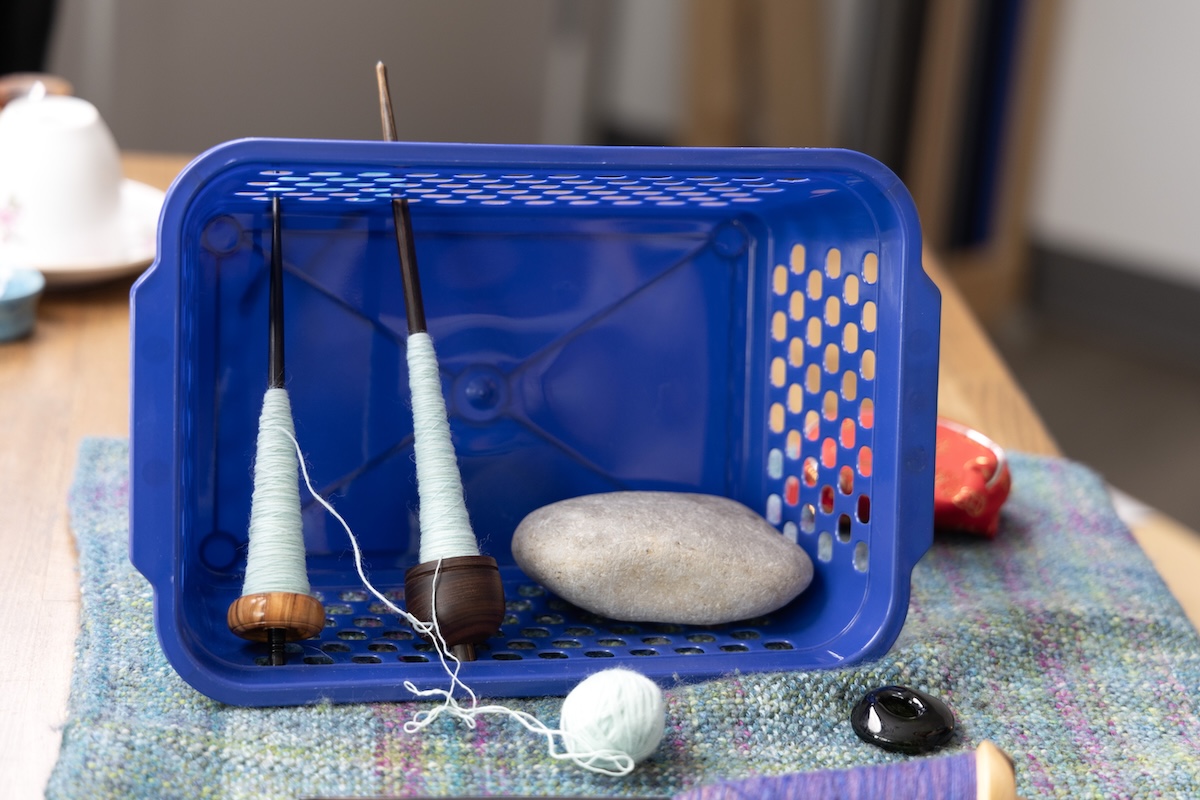
- Secure my spindle(s)in a lazy kate.
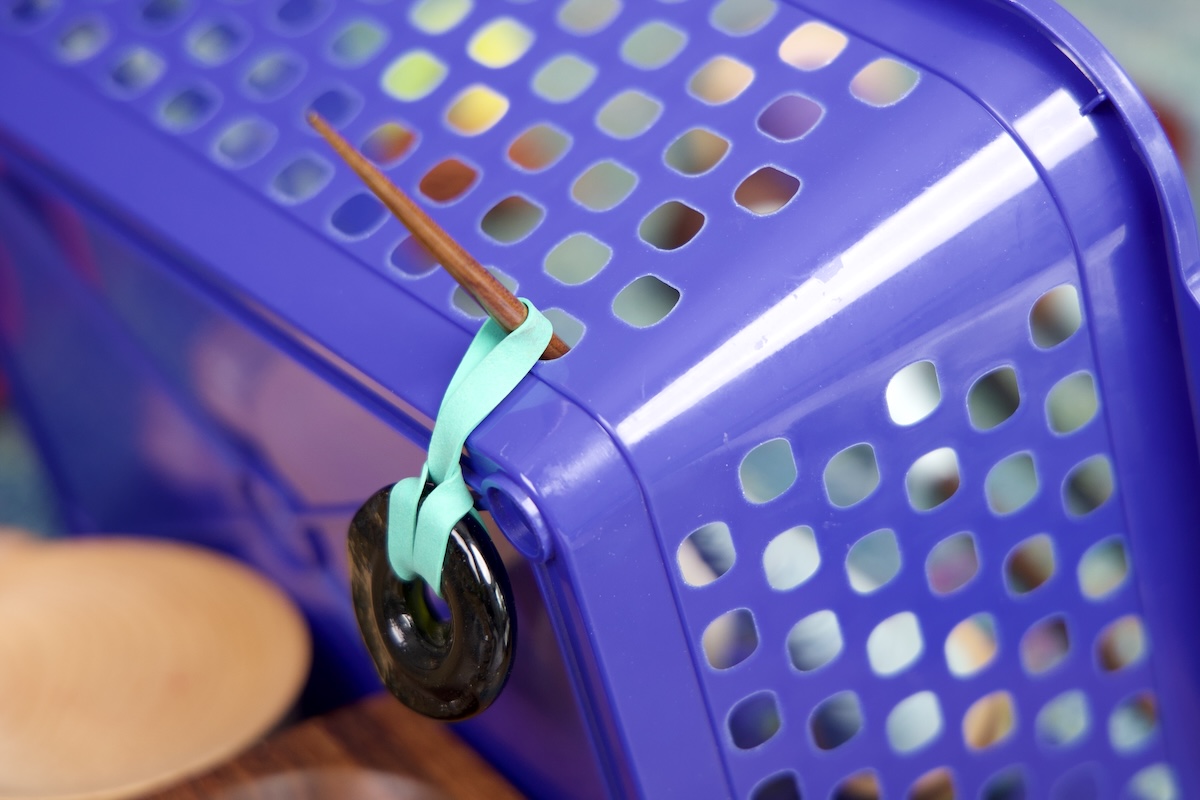
- Add some weights (like rocks) to the lazy kate so I can pull the yarn taut without it flying towards me.
- Add gentle weights (small rubber band with weight) to the spindle(s) so they don’t spin out of control.
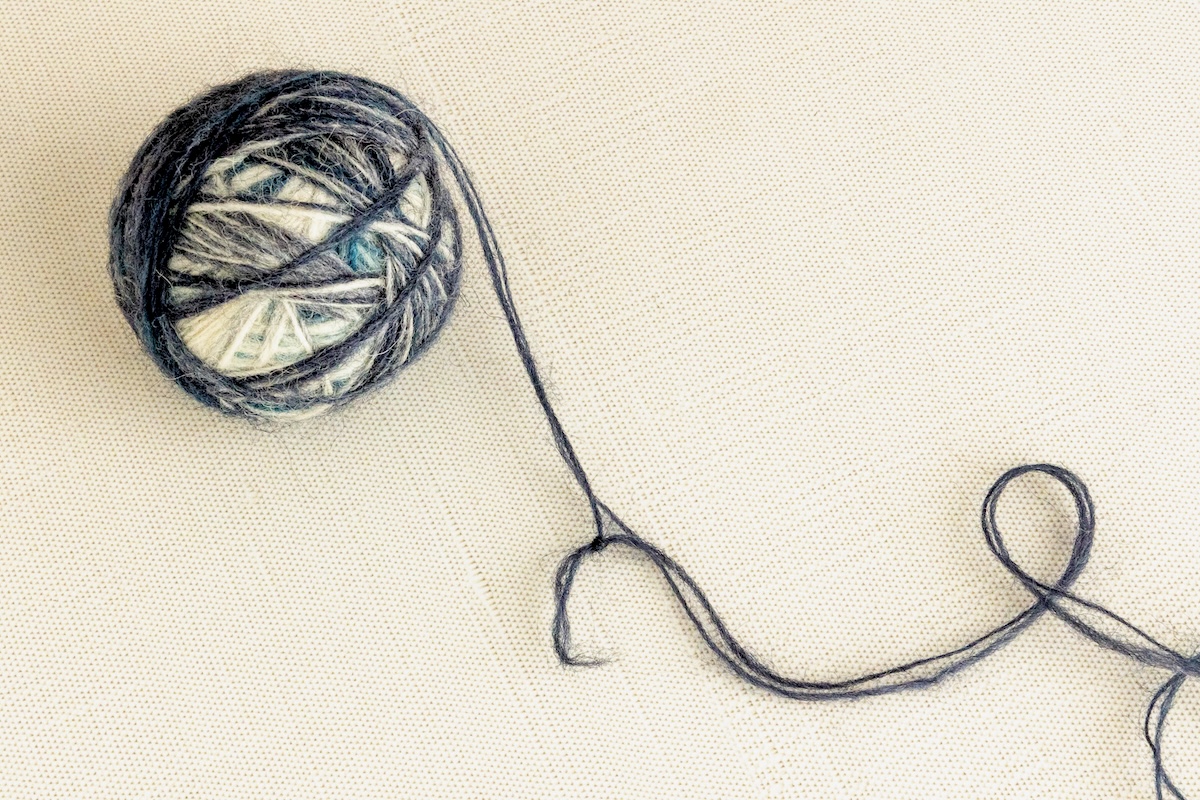
- With one or more strands from the spindles, begin your plying ball. Start your plying ball by winding 20 wraps of the yarn around 4 of your fingers, remove that loop of yarn, wrap yarn around the middle of it (another 20 wraps will do), fold it in half, wrap yarn around the centre of that loop (another dozen wraps), and fold that in half. You will now have enough yarn that you can hold it and start wrapping the yarn in a neat, tight ball, making sure no loops or pigtails get through. Note: the more spindles you have in the lazy kate, the more you need to pay attention to tension so the singles don’t tangle with each other.
- Once you have wrapped all the singles yarn into a ball, bury the end of the yarn into the ball so it won’t come loose. You will be able to find it, I promise.
- Put that ball of singles yarn aside and make more singles. When your spindle is full, wind another ball or add it to another plying ball under development.
The plying ball method of yarn storage requires no additional equipment. However, it is much easier on your hands if you use a support like a felted ball, a small ball of leftover yarn, crumpled paper, or even a rock in the centre of the ball.
If you are emptying more than one spindle you will invariably end one spindle before the other(s), leaving one empty and other(s) with yarn. If there is one spindle left with yarn, and that’s all there is, break the yarn and make a plying bracelet or centre-pull ball with the yarn left on the spindle. Then, attach each end of the yarn to plying ball yarn and continue winding.
You can either splice the yarns for a smooth transition or tie a knot. I often tie a knot to deal with later. If you are winding a three-strand plying ball and one of the two spindles has run out of yarn, splice in a singles yarn from another spindle.
Using a Ball Winder or Nöstepinne
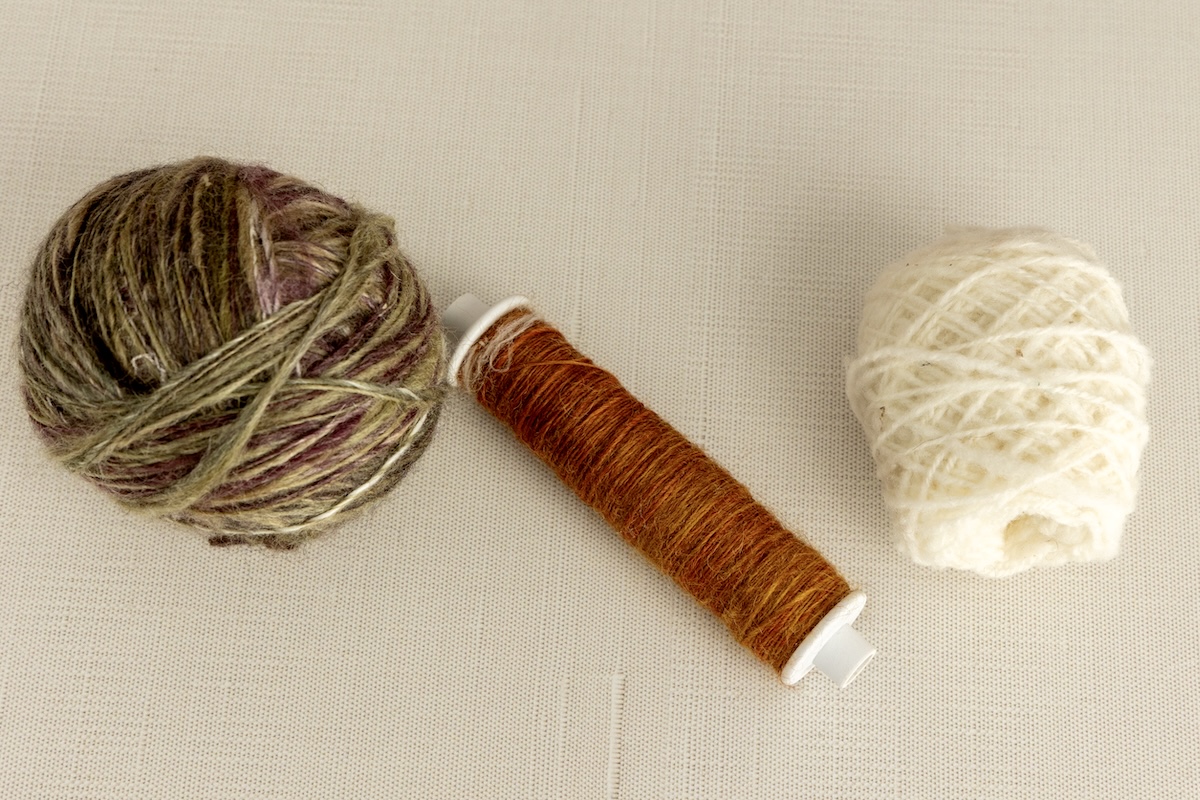
With this technique, the spindle is supported in one hand while the other hand winds a centre-pull ball using a ball winder or nöstepinne. This is a fast way to empty your spindle. It’s important to note that although a ball-winder or nöstepinne creates a centre-pull ball, it doesn’t mean you have to use it that way. You can store your yarn in centre-pull ball format to be used as a singles or use both strands once you decide your plying strategy.
Using a Weaving or Spinning Wheel Bobbin Winder
Wind the singles onto a weaving or spinning bobbin for storage.
No Lazy Kate Method #1
If you don’t have a lazy kate at hand, you can always secure your spindle between your thighs or feet to wind your plying ball. This could prove to be a bit uncomfortable, depending on how pointy the spindle is or its length.
No Lazy Kate Method #2
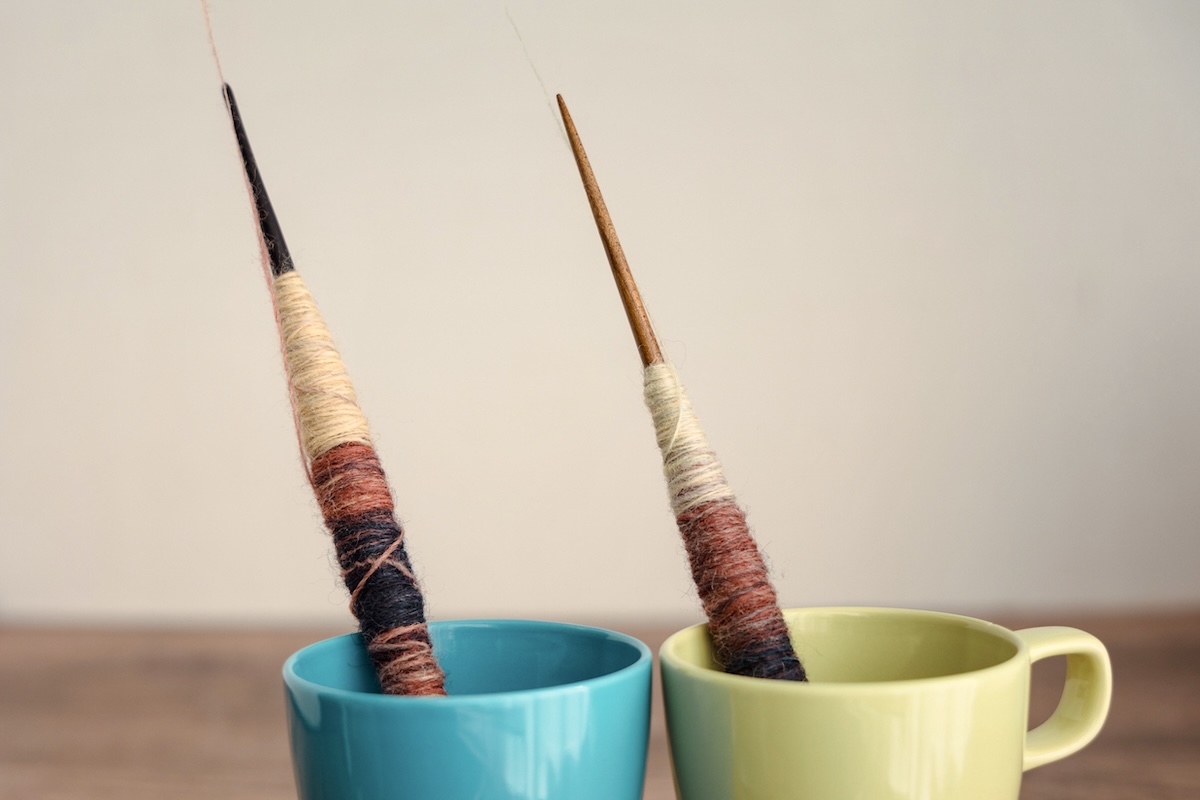
You can hold the spindle whorl side down, and wind singles off the tip of the shaft. This adds a wee bit of twist to your singles, but not so much you’d notice. The main challenge with this approach is that it is impossible to tension the yarns.
No Ply Ball Method #1
You can ply your yarns directly from the spindles and bypass the yarn storage stage. You can put your full spindles in a lazy kate and ply yarn right from the spindles – no removal required. You can start adding ply twist as soon as you pull the yarns from their secured spot in the lazy kate. Like all other plying methods, you can add this twist with a spindle, wheel, e-Spinner – anything that generates twist.
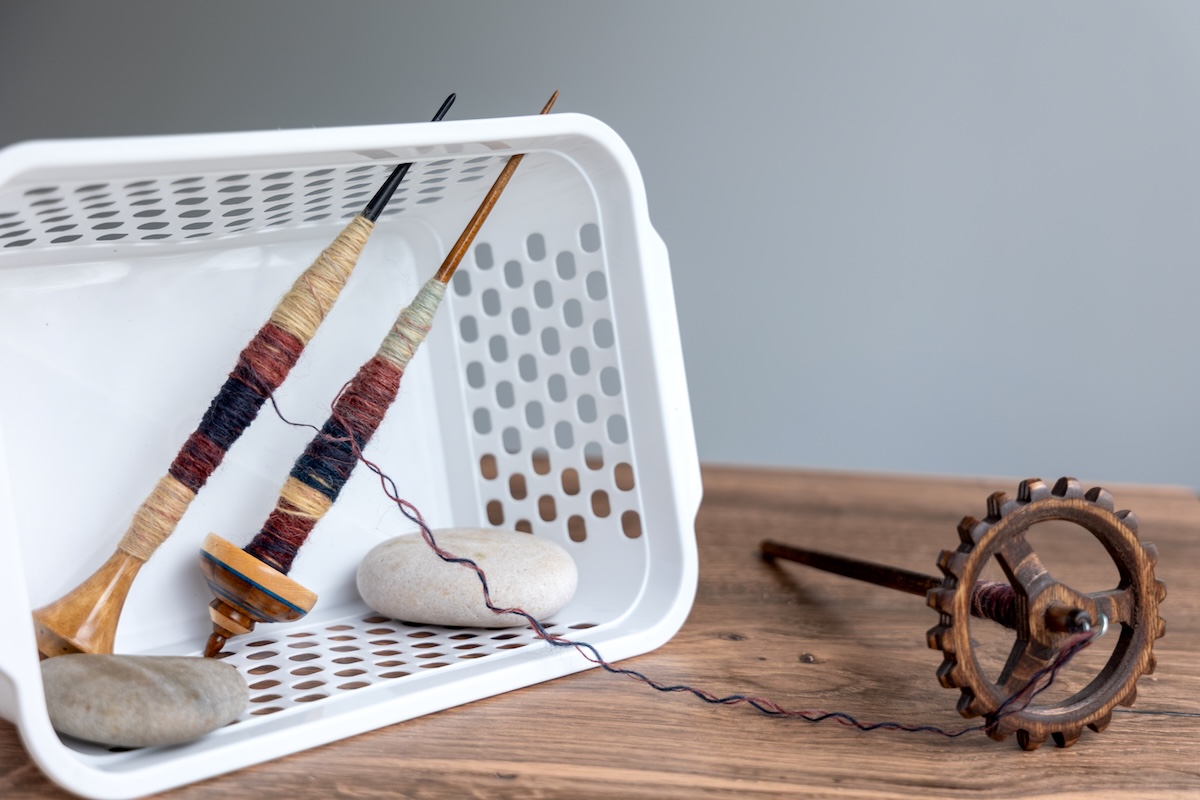
Simply place your full spindles in a lazy kate and ply straight from them.
No Ply Ball Method #2
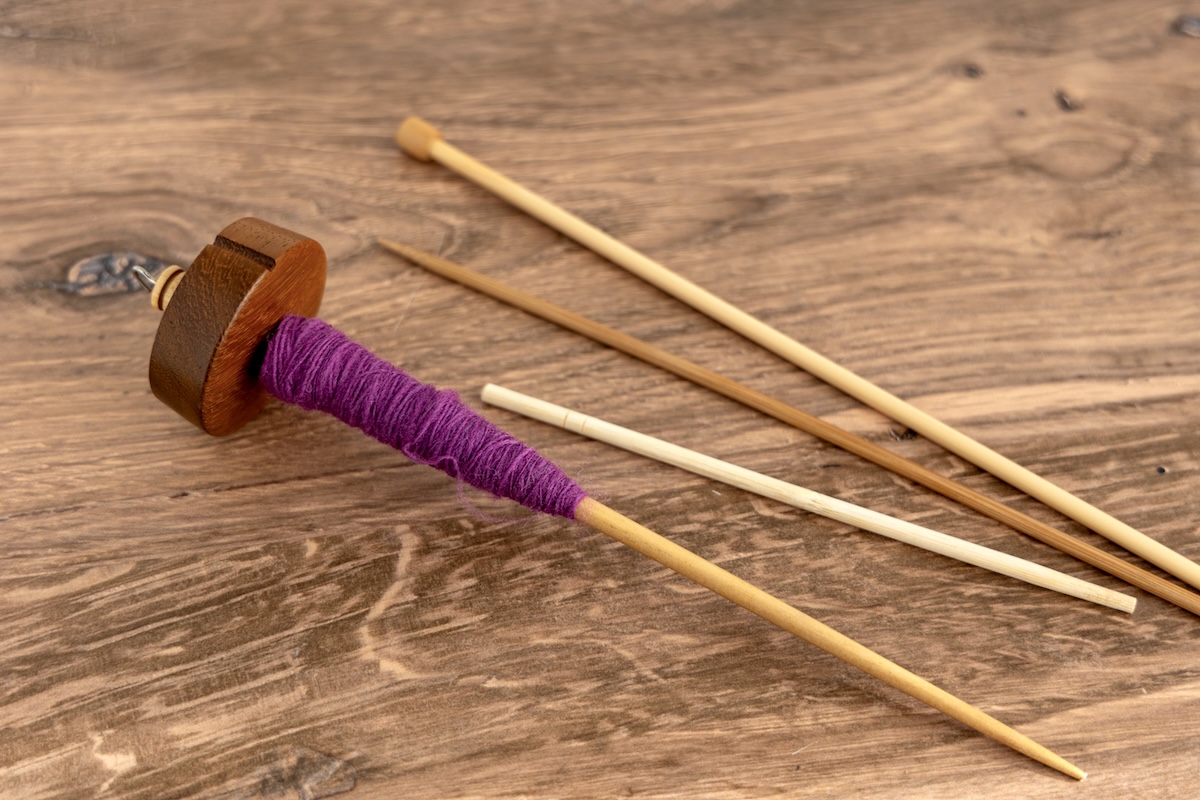
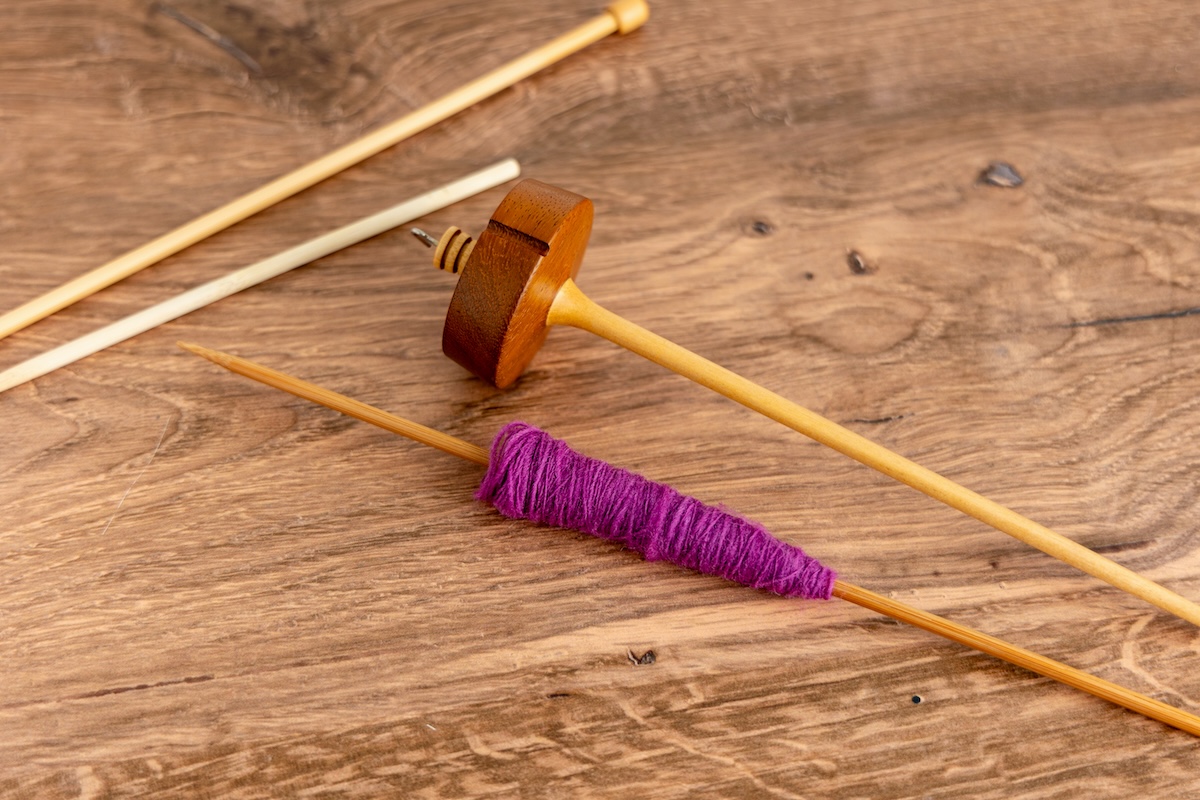
Finally, you can also remove the singles yarn by sliding the cop directly onto a knitting needle, dowel, or even a straw. Put that onto a lazy kate and ply from there. A cop is the yarn wound onto the shaft of the spindle while spinning. When wound around the arms of a Turkish spindle, it is also referred to as a Turtle.
While I felt I needed to mention the last two options, these are not ways that I choose to empty my spindles and ply the yarn. Here are a few reasons why:
- These two methods cause high-stress plying unless you can keep your spindles, knitting needle, or dowel from spinning freely because the singles yarn has a lot of active twist stored in it.
- Another downfall to the technique of plying right from the spindles or cop is that you don’t get a chance to condition your yarn, as mentioned eariler.
- Additionally, it is a tricky method to start and stop the plying process once started, and it tends not to be a relaxing endeavour.
Adding Counter Twist/Plying
With a Suspended Spindle
Tie a knot at the end of the two strands and slide it onto your spindle; top-whorl, bottom-whorl, and Turkish styles all make good plying spindles. Draw out a length of the yarn, make sure it is notched or wrapped around the hook, and let go. Before you even reach down to flick the spindle into motion, look at the direction it is spinning. The active twist in the singles will move the spindle in the direction it needs to go. Just wait a second and let physics take the lead. Put as much ply twist into the yarn as needed. Wind the yarn onto the spindle shaft and repeat. I hold the plying ball in one hand and use the other hand to roll the spindle and wind the yarn into the spindle.
With a Supported Spindle
You can attach your two-strand yarn to the support spindle, add ply twist, and wind a cop onto the spindle.
Spin, Ply and Explore!
There are a variety of ways to remove and store the singles yarn made on spindles. I encourage you to explore the different options, just so you have additional tools in your spindle spinning toolkit. Now that you know how to spin singles on your spindles and ply your singles, you are that much closer to understanding how to spin your yarn of choice. Happy spindling!
Learn more about spindle spinning with Diana Twiss’ fabulous online courses at the School of SweetGeorgia (SOS), including: Spinning with Suspended Spindles, Spinning with Supported Spindles, and the more recent Next-Level Spindle Spinning course.
If you’re not yet a member of the School, you can access a 14-day trial for just $1 using the code: EXPLOREWITHUS. Come and explore spinning and all of the fibre arts!
The post From Singles on a Spindle to Plied Yarn in Your Hands appeared first on SweetGeorgia Yarns.


