
You’ve spent hundreds or maybe even thousands of hours knitting a masterpiece, and you can’t wait to use, wear, and show it off. But wait, what about those yarn tails at the beginning and end, or where you joined a new skein? Weaving in ends can seem like a drag on the excitement of a newly finished project, but it doesn’t have to be. This article will cover some basic end-weaving techniques that’ll make this finishing task a breeze.
While knitters have developed a variety of techniques for weaving in ends over the centuries, they all fall into two basic categories: weaving them in at the end of the project or weaving them in as you go. Some knitters prefer weaving as they go, leaving them with less finishing to do at the end, while others like the precision of weaving in at the end. A few of the most popular methods include:
- Weaving in ends with a tapestry needle.
- Splitting plies and weaving them in with a tapestry needle.
- Weaving ends into the fabric as you knit.
While this list isn’t exhaustive, these common options will work in most projects and are an essential addition to any knitter’s toolkit of skills. And don’t worry—they’re much simpler than they might sound!
Weaving In Ends with a Tapestry Needle
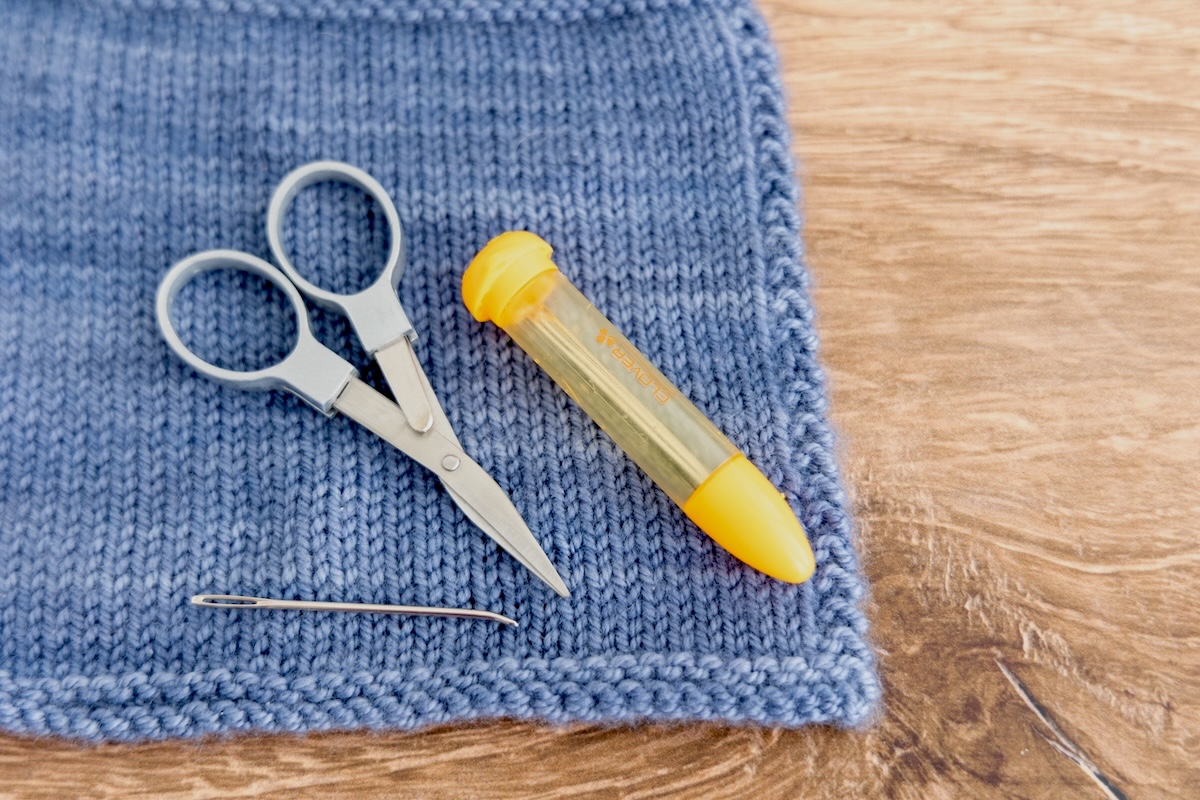
The tapestry needle method is a classic end-weaving technique for good reason. It’s easy to learn and can be adapted for almost any yarn or knitted fabric. All you’ll need is a finished project with loose tails and a tapestry needle with an eye big enough to accommodate the thickness of your yarn. Some knitters prefer to weave ends in before washing; I personally weave them in after, especially for lace projects, since woven-in ends can sometimes inhibit the stretch of fabric that needs to grow during washing and blocking.
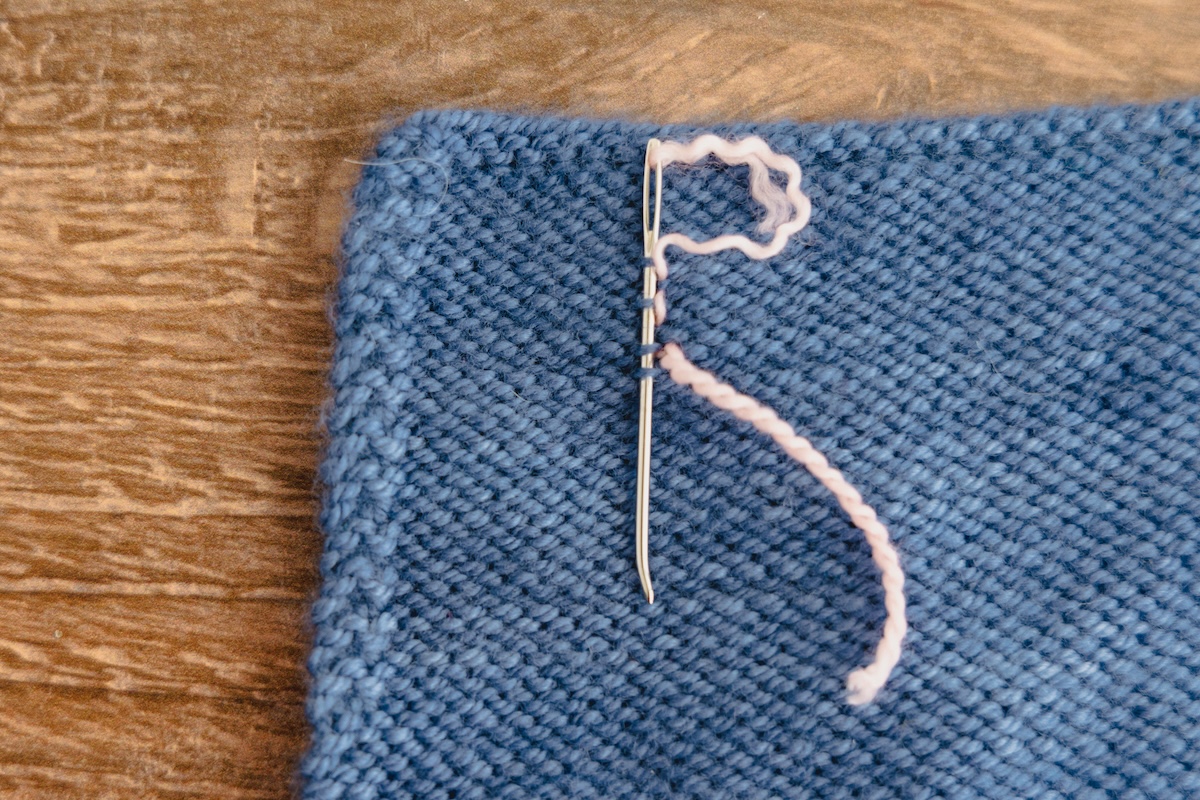
To start weaving in your ends, flip your work to the wrong side. You’ll want to look for ways to hide the ends in the texture of the fabric as much as possible. (The example below is in stockinette stitch, but this method works for any stitch pattern). In this case, the purl bumps are our best bet.
Thread your yarn tail through your tapestry needle and insert the needle into the closest stitch. Notice how the tip of the needle splits the plies (individual threads in a strand of yarn) of the stitch rather than poking through to the right side. Splitting the plies keeps the ends hidden on the wrong side of the fabric.
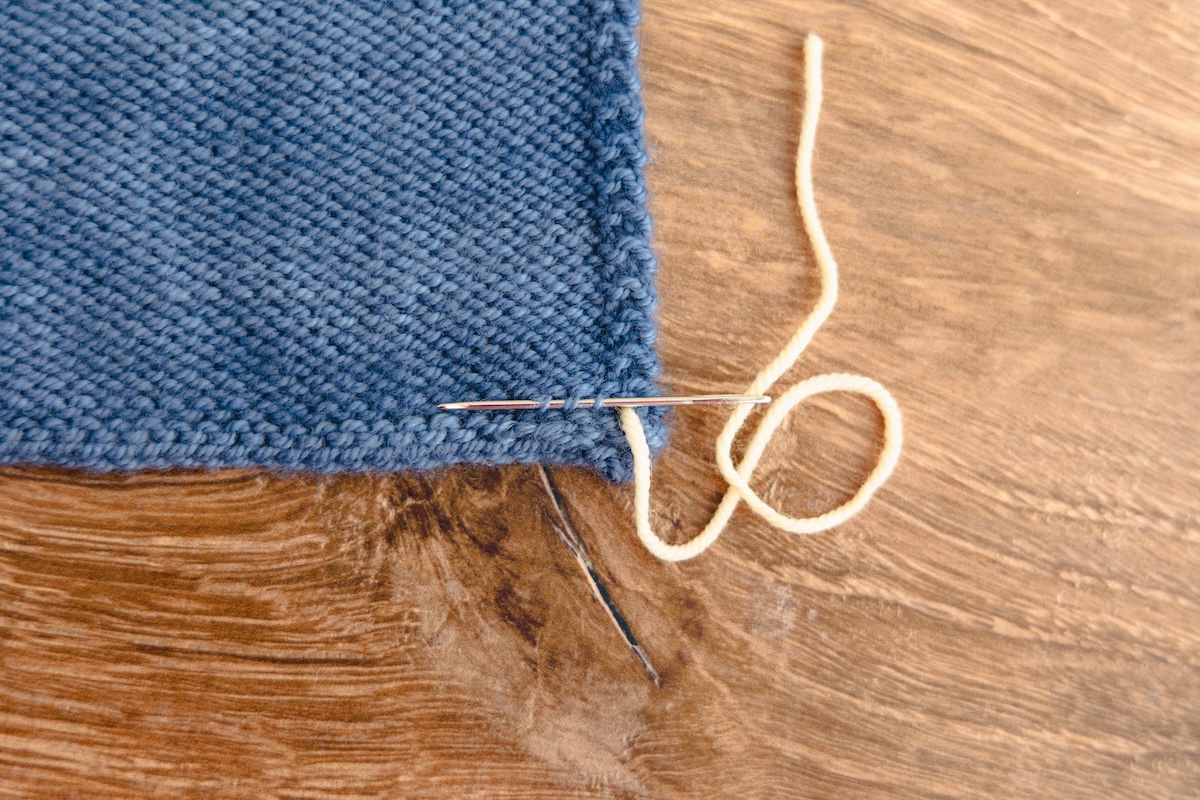
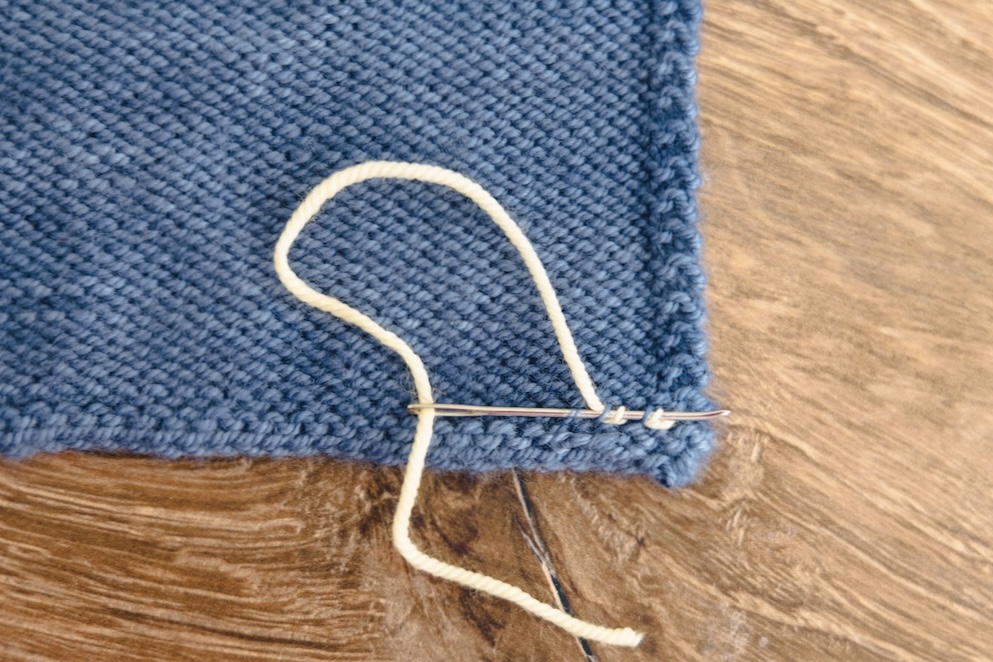
Repeat for several more stitches. You can alternate between inserting your needle from above and below the stitch, in a wave pattern, or always insert from the same direction; either way will work.
If you’re like me, and like just a bit of extra security to keep your ends from unravelling, you can weave back over what you just wove in. When inserting my needle, I try to catch plies from both the woven-in tail and the original knitted stitches at least a couple of times, which anchors the tail in place.
Weaving In Ends by Splitting the Yarn into Plies
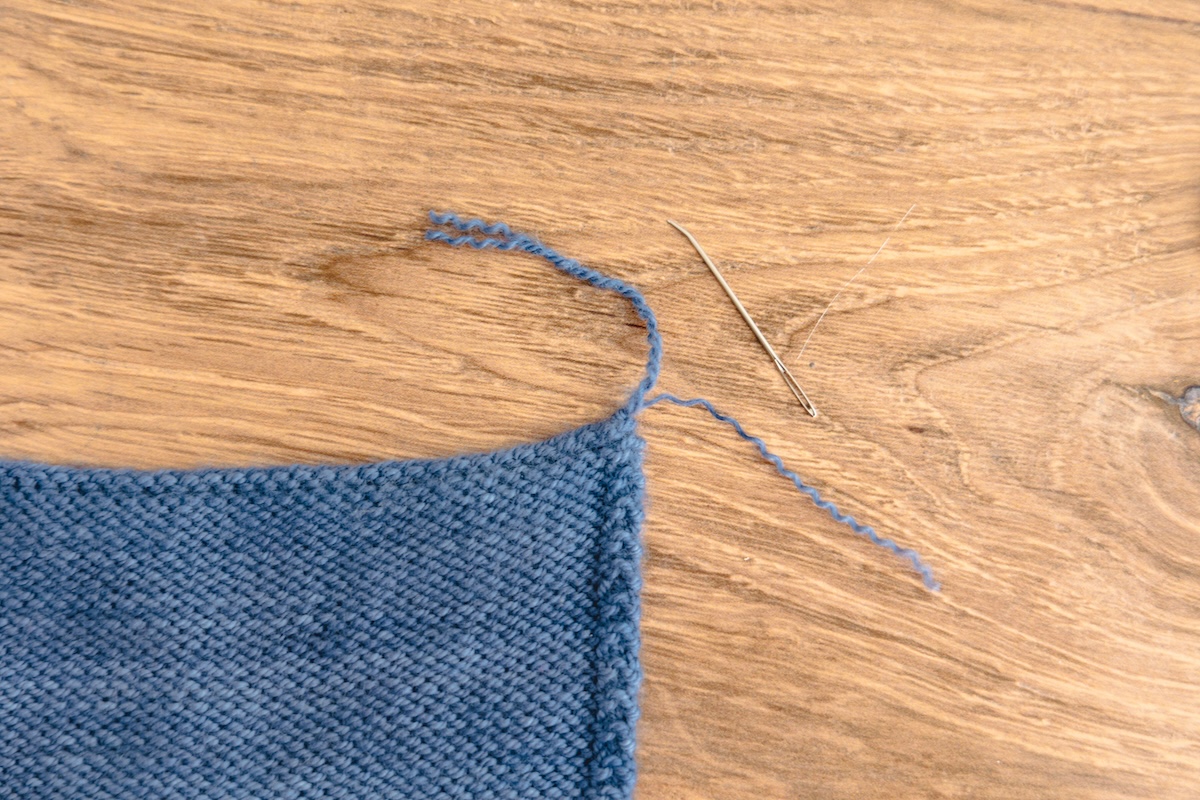
Sometimes if a particular yarn is extra thick, or a knitted fabric is delicate, it can be difficult to keep the woven-in tail from showing through to the other side. In that case, try splitting your yarn tails into groups of just a few plies and weaving those groups in, rather than weaving in the entire tail in one place. It does make the process longer, but the results are near-invisible and unlikely to unravel.

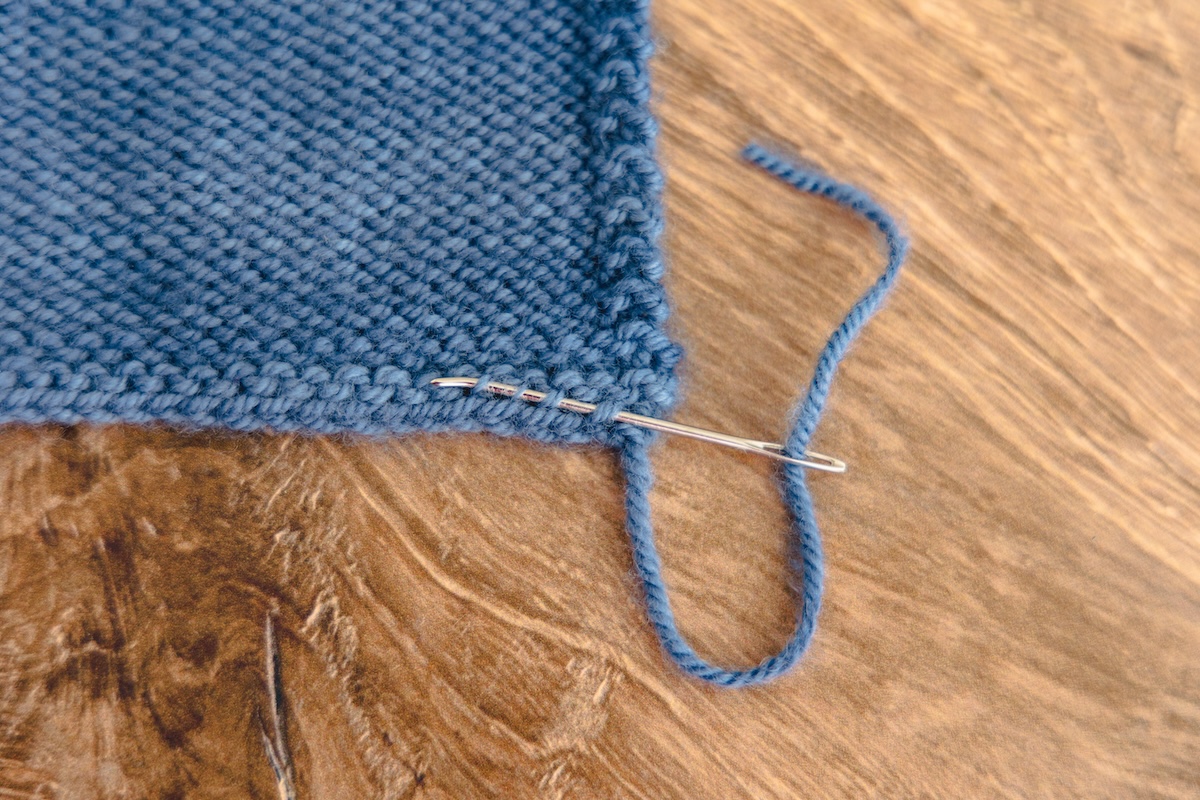
It’s also helpful to consider the direction your fabric needs to stretch when weaving in your ends (again, a woven-in end prevents that area of the fabric from stretching). If your project needs to stretch horizontally, as with a hat or a sock, try weaving in your ends vertically instead. You’ll use the exact same technique as above, but you’ll be inserting your needle into the next stitch above or below rather than to the left or right.
Weaving In Ends As You Go
For knitters who want to minimize the amount of finishing work left to do at the end, try weaving in your ends as you knit! This method is easier to show than to describe, so SweetGeorgia Yarns has this handy video tutorial. The video shows two yarn colours to make the technique easier to see, but this can absolutely be used when joining a new skein of the same colour.
As you can see, this method incorporates the yarn tail into the knitted fabric by alternately wrapping it over or under the working yarn (the strand you’re currently knitting with). It can take some time to get the hang of, but will quickly become second nature with practice.
Hiding Ends
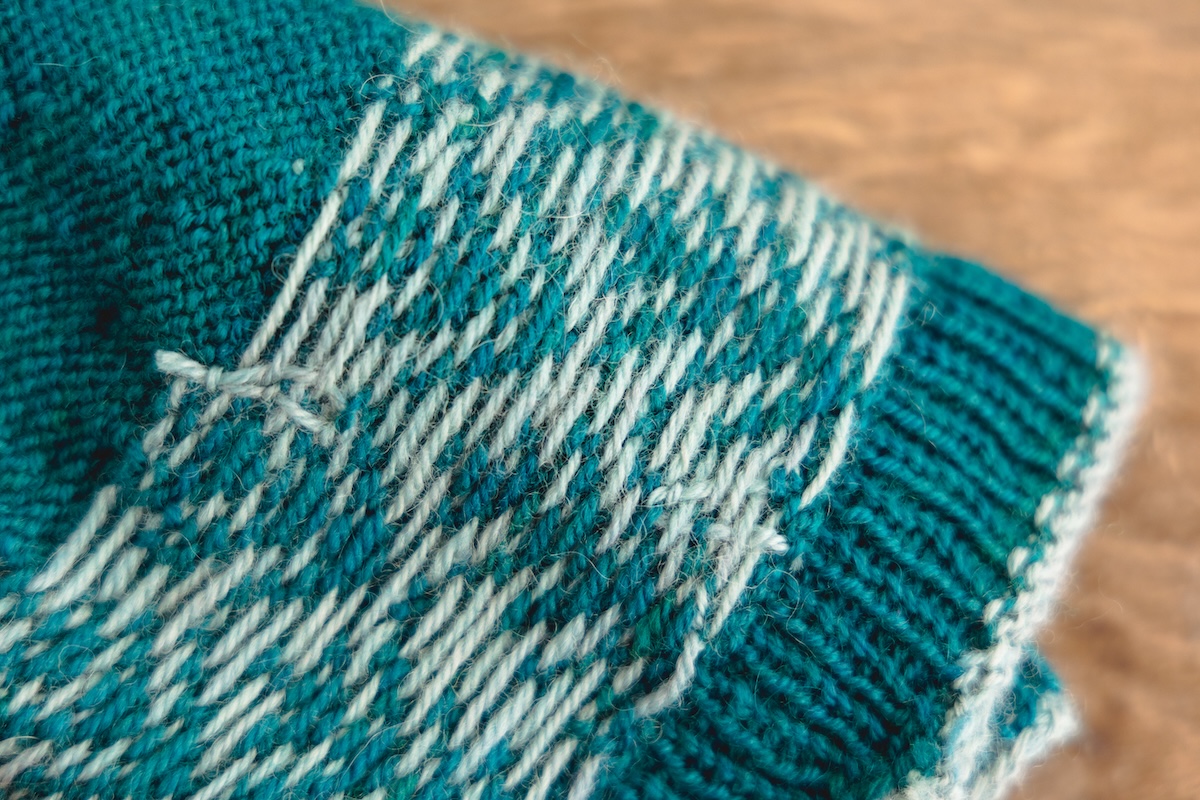
While all these methods inherently help to hide the tail on the wrong side of the fabric, it can still be tricky to keep the woven-in ends completely hidden. Look for textures in the knitted fabric that you can use to hide any minor unevenness that might result from weaving in your tail. I personally love weaving my ends into the wrong side of an edge where stitches were picked up or in the ridge created by alternating skeins every couple of rows when I’m working with hand-dyed yarn. The backside of cables or decrease lines can also be a great hiding place.
Choosing the Right Method for Weaving In Ends in Your Project
So which of the methods above is the right one for you? Much of this will come down to personal preference, so definitely experiment to see which you like best. Each method has its pros and cons; this list can serve as a great jumping-off point as you try them for yourself.
Pros and cons of weaving in ends with a tapestry needle
Pros:
- An all-purpose method suitable for any fabric
- Gives maximum control over where/what direction to weave in the ends
- Extremely secure, making it a great choice for slippery yarns
- Works best for yarns with multiple plies
- Is ideal for thick yarns that may need to be split into plies to avoid adding bulk or distorting the fabric
Cons:
- Leaves more finishing work to do at the end of the project
- Can damage single-ply or some woolen-spun yarns since this method involves splitting the fibers of the yarn
Pros and cons of weaving in ends as you go
Pros:
- Fast and easy, with little finishing to do at the end of the project
- Works particularly well with single ply yarns that are too delicate for the tapestry needle method
- Also works well with non-superwash yarns, since the ends will meld into the fabric with washing
- Less risk of damaging the structural integrity of more delicate fabrics
Cons:
- Less secure for superwash or slippery yarns, with a higher risk of unraveling
- Can add too much bulk when working with a heavier yarn, distorting the fabric
With that, go forth weaving in ends in your knitting—and may all your ends be successfully woven in!
To hear all about our latest knitting projects, helpful articles, yarn and fibre releases, School of SweetGeorgia courses, and more, sign up to receive the SweetGeorgia newsletter. New subscribers receive our free knitting pattern bundle plus a welcome discount code to use at our online shop!
The post Approaches to Weaving in Yarn Ends in Knitting appeared first on SweetGeorgia Yarns.


